Proper chain maintenance is crucial for ensuring the longevity and performance of your bicycle or machinery. A well-maintained chain contributes to smoother operation, reduces wear on components, and enhances overall efficiency. Neglecting this essential task can lead to increased friction, premature wear, and costly repairs. Therefore, knowing how to clean, lubricate, and adjust your chain is fundamental for any user.
Cleaning your chain removes dirt, grime, and debris that can accumulate over time, hindering performance. A clean chain operates more efficiently, reducing the energy required for movement and enhancing the overall riding experience. Following the cleaning process, proper lubrication is essential. Lubricants not only reduce friction but also protect against rust and corrosion, ensuring that your chain remains flexible and functional.
Lastly, regular adjustments are needed to maintain optimal tension and alignment, which plays a significant role in the chain’s effectiveness. A correctly adjusted chain minimizes slippage and improves drivetrain efficiency. This guide will walk you through each step of the process, equipping you with the necessary knowledge to keep your chain in top condition, thus enhancing the reliability and performance of your equipment.
Chain Maintenance Guide: Clean, Lubricate, and Adjust
Proper maintenance of your chain is essential for optimal performance and longevity. This guide outlines the crucial steps to clean, lubricate, and adjust your chain effectively.
1. Cleaning the Chain
Regular cleaning removes dirt, grime, and old lubricant that can hinder chain performance. Follow these steps:
- Gather your cleaning supplies: chain cleaner, a brush (preferably a stiff one), a rag, and possibly a chain cleaning tool.
- Position the bike on a stand or flip it upside down for better access.
- Apply the chain cleaner generously, ensuring it saturates the chain.
- Use the brush to scrub the chain thoroughly, focusing on the links and rollers. Ensure all dirt is removed.
- Wipe off any excess cleaner with a clean rag.
2. Lubricating the Chain

Lubrication reduces friction and wear, allowing for smoother operation. Here’s how to do it properly:
- Select a suitable chain lubricant based on your environment (wet or dry lube).
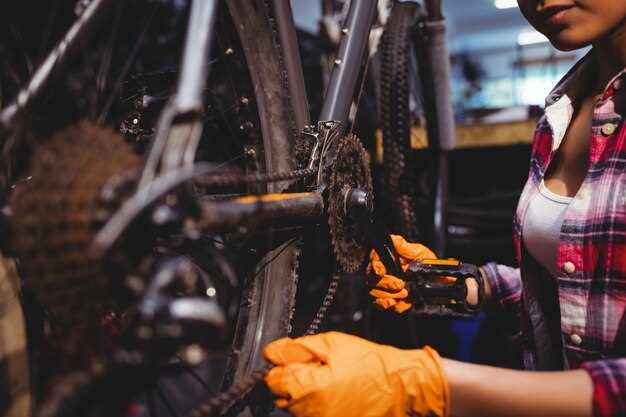
- While rotating the pedals, apply a small amount of lubricant to each link, ensuring even coverage.
- Allow the lubricant to penetrate for a few minutes, then wipe off any excess with a rag to prevent dirt accumulation.
3. Adjusting the Chain

An appropriately tensioned chain enhances performance and prevents premature wear. Follow these guidelines for adjustment:
- Check the chain tension by pressing on the bottom section of the chain; it should have a slight give, generally around half an inch.
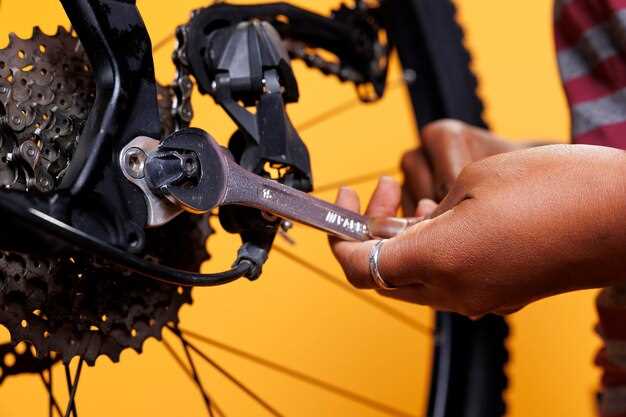
- If the chain is too loose, locate the rear axle nuts and loosen them.
- Adjust the rear wheel position to increase tension, ensuring the chain remains aligned.
- Tighten the axle nuts securely once the correct tension is achieved.
- Re-check the tension after tightening to ensure it remains consistent.
By following this Chain Maintenance Guide, you will ensure that your chain operates efficiently, prolonging its lifespan and contributing to the overall performance of your bike.
How to Properly Clean Your Chain for Optimal Performance
Cleaning your chain is essential for maintaining the performance and longevity of your bike. A clean chain ensures smooth gear shifts, reduces wear on components, and enhances overall riding efficiency. Follow these steps to clean your chain effectively.
First, gather the necessary tools and materials: a chain cleaning tool, degreaser, soft brush, rags, and lubricant. Ensure you work in a well-ventilated area to avoid inhaling fumes from the degreaser.
Begin by shifting your bike into the smallest gear. This positions the chain in a more accessible place for cleaning. Use the chain cleaning tool filled with degreaser to scrub the chain. Follow the manufacturer’s instructions for the tool, but generally, you will attach it to the chain and pedal backward to allow the degreaser to penetrate and lift dirt and grime.
After a thorough application, remove the chain cleaning tool and use a soft brush to reach any difficult areas. Pay special attention to the links and rollers, as these spots tend to accumulate the most dirt.
Next, take a clean rag to wipe down the chain, removing any remaining degreaser and dirt. It is crucial to ensure no residue is left, as it can interfere with the lubricant application later on.
Once the chain is dry, apply a suitable lubricant. Use a dropper or a fine nozzle to apply lubricant to the inside of each link while pedaling backward. This practice ensures even distribution throughout the chain. Allow the lubricant to sit for a few minutes before wiping off any excess with a clean rag.
Regular cleaning, ideally after every few rides or when you notice a build-up of dirt, will keep your chain in prime condition. By adhering to this cleaning routine, you will enhance your bike’s performance and extend the life of the drivetrain components.
Choosing the Right Lubricant for Different Chain Types
Selecting the appropriate lubricant for your chain type is crucial to ensure optimal performance and longevity. Various chains, such as roller chains, bicycle chains, and motorcycle chains, have distinct characteristics that require specific lubrication solutions.
Roller Chains: These chains are commonly used in industrial applications. They typically operate in environments where debris and dust are present. A lubricant with high viscosity and good adhesive properties is essential. Heavy-duty oils or greases containing additives to resist wear and corrosion are ideal for roller chains, as they can maintain a protective film even under heavy loads.
Bicycle Chains: For bicycle chains, the choice of lubricant depends on the riding conditions. In dry environments, a dry lubricant containing Teflon or wax is effective as it minimizes dirt accumulation. Conversely, in wet conditions, a wax-based or wet lube is preferred as it repels water and provides lasting protection against rust.
Motorcycle Chains: Motorcycle chains require lubricants that can withstand high temperatures and pressures. Chain oils specifically designed for motorcycles typically contain additives to enhance wear resistance and reduce friction. Look for a product with a tacky consistency that clings to the chain and offers protection from environmental contaminants.
Specialty Chains: Specialty applications, such as in food processing or medical environments, demand food-grade lubricants that meet specific safety standards. Food-grade lubricants are formulated to minimize health risks while effectively reducing friction and wear in chains used in these sensitive areas.
Ultimately, always refer to the manufacturer’s specifications for your specific chain type to select the most suitable lubricant. Adhering to these guidelines will help maintain performance, reduce wear, and extend the life of your chains.
Steps to Adjust Chain Tension and Alignment Accurately
Proper chain tension and alignment are crucial for optimal performance and longevity of your drivetrain. Follow these steps to ensure accurate adjustments.
First, elevate the bike using a bike stand or a similar support, allowing for easy access to the chain and rear wheel. Once elevated, shift the bike into the smallest chainring and the smallest rear cog to release tension on the chain.
Next, inspect the current chain tension. You should have a slight amount of slack in the chain when it’s in the resting position. Typically, a chain should have about 1/2 inch (1.27 cm) of vertical play when you press it midway between the sprockets. If the chain is too loose, it will skip gears; if too tight, it can cause excessive wear.
To adjust the chain tension, locate the rear axle tension adjusting bolts on the dropouts. Loosen the lock nuts on both sides before making any adjustments. Turn the tensioning screws evenly, moving them clockwise to increase tension or counter-clockwise to decrease it. After adjusting, recheck the chain slack to ensure it is within acceptable limits.
After achieving the desired tension, it’s crucial to align the rear wheel accurately. Check if the wheel is seated properly in the dropouts. The distance between the rear triangle and the axle should be equal on both sides. Use a ruler to measure and confirm the alignment. If the wheel is misaligned, carefully reposition it by loosening the axle nuts and adjusting as necessary.
Once the alignment looks correct, tighten the axle nuts securely while ensuring the tension remains unchanged. Also, recheck the chain tension one last time after securing everything.
Finally, test ride the bike to ensure the chain runs smoothly over gears without skipping or noise, confirming that the adjustments were successful.