Maintaining the braking system of your vehicle is crucial for safety and performance. One essential aspect of brake maintenance is bleeding the brakes, a process that removes air bubbles from the brake lines, ensuring a firm and responsive pedal. While vacuum tools can make this job easier, they are not always necessary. In this article, we will explore effective methods to bleed your brakes without the aid of a vacuum tool.
Understanding the importance of a well-functioning brake system is imperative for any driver. Air trapped in the brake lines can lead to a spongy pedal feel and prolonged stopping distances, which can be dangerous. By learning to effectively bleed your brakes using simple tools, you can save time and money while enhancing your vehicle’s performance.
This guide will walk you through different techniques for bleeding brakes, including the classic two-person pump-and-hold method and the one-person gravity bleed technique. Each method has its advantages, and we will discuss the step-by-step processes involved to ensure that you can safely and efficiently bleed your brakes, even without specialized tools.
Preparing Your Tools and Workspace for Brake Bleeding
Before starting the brake bleeding process, it is essential to gather all necessary tools and prepare your workspace to ensure efficiency and safety. Begin with a clean and organized area where you can comfortably access the vehicle’s brakes. Make sure the space is well-lit to avoid missing any crucial steps.
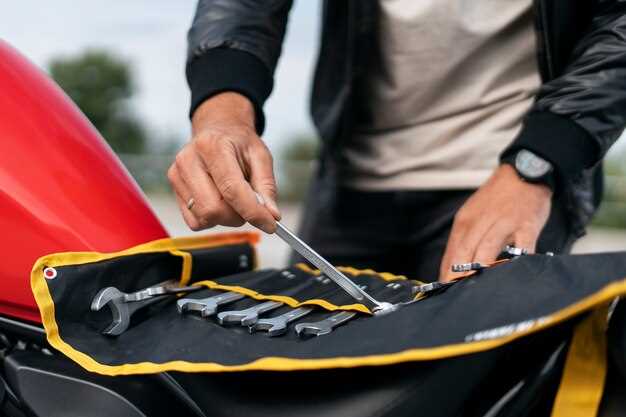
Start by collecting the required tools: a brake bleeder wrench or open-end wrench for the bleed valves, a clear plastic tube that fits snugly over the bleed nipple, a container to catch old brake fluid, and new brake fluid that is compatible with your vehicle (typically DOT 3, DOT 4, or DOT 5.1). Additionally, consider having a soft cloth or rags on hand to wipe away any spills and maintain a clean workspace.
Safety equipment should also be on your list. Wear gloves to protect your hands from brake fluid, which can damage skin and automotive paint. Safety glasses are advisable to shield your eyes from splashes. Ensure the vehicle is parked on a level surface and secured with wheel chocks to prevent rolling.
Before beginning the actual bleeding process, check the condition of the brake fluid reservoir. If the fluid is dirty, consider flushing the entire brake system first. Ensure that the reservoir is filled to the recommended level with new brake fluid before starting to bleed the brakes.
Once your tools are gathered and your workspace is prepared, you can confidently proceed with the brake bleeding process, knowing you have set yourself up for success.
Step-by-Step Guide to Manual Brake Bleeding

Manual brake bleeding is a straightforward process that ensures your brake system is free of air bubbles, which can cause spongy brakes or reduced braking efficiency. Follow these steps for effective manual brake bleeding.
Tools and Materials Needed:
- Brake fluid (check the type compatible with your vehicle)
- Clear plastic tubing (to fit over the brake bleeder valve)
- A container to catch old brake fluid
- Wrench that fits the bleeder valve
- Helper or a brake bleeder kit
Step 1: Prepare the Vehicle
Park the vehicle on a level surface and engage the parking brake. Remove the wheel covering the brake you intend to bleed. Check the brake fluid reservoir and ensure it has sufficient fluid; top it off if necessary to prevent it from running dry during the process.
Step 2: Locate the Bleeder Valve
Find the bleeder valve on the brake caliper or wheel cylinder. It is usually a small metal valve with a rubber cap. Remove the cap and clean the area around the valve to prevent dirt from entering the system.
Step 3: Attach the Tubing
Slide one end of the clear plastic tubing over the bleeder valve. Place the other end into a container to catch the expelled brake fluid. This setup prevents fluid from spilling and makes it easy to observe when air bubbles cease.
Step 4: Bleed the Brakes
With your helper assisting, have them pump the brake pedal several times to build pressure, and then hold the pedal down. While the pedal is held, use the wrench to open the bleeder valve slightly. Allow fluid to flow out until it runs clear without air bubbles. Close the valve before your helper releases the brake pedal. Repeat this process until no air bubbles are visible in the fluid.
Step 5: Monitor Brake Fluid Levels
Check the brake fluid reservoir frequently during the bleeding process, ensuring it does not run low. Refill as necessary to maintain proper levels and avoid introducing air back into the system.
Step 6: Repeat for Each Brake
Move to the next brake, repeating the bleeding process. The typical order for bleeding brakes is to start with the wheel farthest from the master cylinder, usually the right rear, followed by the left rear, then the right front, and finally the left front.
Step 7: Final Check and Cleanup
After bleeding all brakes, check the fluid levels in the reservoir one last time and top off if needed. Replace the wheels and securely tighten any lug nuts. Clean any spilled brake fluid promptly, as it can damage car paint. Test the brakes gently before driving to ensure they feel firm and responsive.
Following these steps will help ensure that your brake system is correctly bled, allowing for efficient and safe braking performance.
Troubleshooting Common Issues During Brake Bleeding

Brake bleeding can sometimes be frustrating due to several common issues that may arise. Understanding these issues can help you successfully bleed your brakes without a vacuum tool.
One common problem is air remaining in the brake lines. If you notice a spongy brake pedal after bleeding, it’s likely that air bubbles have not been completely removed. To resolve this, repeat the bleeding process, ensuring that the brake fluid reservoir does not run low during the procedure. Use a clear line attached to the bleeder screw to visualize air bubbles as you pump the brake pedal.
Another issue could be the presence of contaminated brake fluid. If the fluid appears dark or murky, it may indicate that it is old or contaminated, leading to ineffective braking performance. In this case, flush the entire brake system with new brake fluid before attempting to bleed the brakes again.
Hydraulic issues can also cause complications. If the brake pedal feels hard or unresponsive, there may be a problem with the master cylinder or brake booster. Inspect these components for leaks or damage and replace them if necessary. If the brake pedal sinks to the floor during bleeding, it may indicate a faulty master cylinder that needs replacement.
Using the wrong type of brake fluid can lead to system failure. Ensure that the fluid used matches the manufacturer’s specifications for your vehicle. Mixing different types of brake fluid can create chemical reactions that compromise braking efficiency.
Finally, improper technique during the bleeding process can result in incomplete bleeding. Ensure the correct order of bleeding the brakes–start with the wheel furthest from the master cylinder and work your way to the closest. Additionally, checking the tightness of the bleeder screws after bleeding is crucial to avoid future leaks.