Regular maintenance is essential for the longevity and performance of your motorcycle. One of the most crucial tasks in this maintenance routine is changing the oil, which ensures that the engine runs smoothly and efficiently. Over time, oil can become contaminated with dirt, debris, and metal particles, leading to increased wear and tear on the engine components. This guide will provide you with a comprehensive, step-by-step process to change your motorcycle oil effectively.
Before you get started, it’s important to gather all the necessary tools and materials. These typically include a suitable oil filter, the correct type and amount of oil, a wrench set, an oil drain pan, and a funnel. Having the right equipment on hand will make the process smoother and more efficient, allowing you to focus on performing the task safely and correctly.
In this guide, we will walk you through each step, from preparing your motorcycle for the oil change to properly disposing of the old oil. By following these instructions, you’ll not only enhance your motorcycle’s performance but also gain valuable skills that can save you time and money in the long run. So, let’s get started on the journey of maintaining your motorcycle with a fresh oil change!
Gathering the Necessary Tools and Materials for an Oil Change
Before starting the oil change process, it is essential to gather all necessary tools and materials to ensure a smooth and efficient procedure. Here is a comprehensive list of what you will need:
1. Tools:
– Wrench set: A set of wrenches is crucial for removing the oil drain plug. Make sure to have the correct size for your motorcycle.
– Screwdriver: A screwdriver may be needed to remove any covers or panels blocking access to the oil filter.
– Oil filter wrench: This specialized tool assists in easily loosening and removing the old oil filter, especially in tight spaces.
– Ratcheting socket set: This can speed up the process of removing bolts and screws, especially those that may be difficult to access.
2. Materials:
– Motorcycle oil: Research the type and grade of oil recommended by your motorcycle manufacturer. Ensure you have the correct amount, typically stated in quarts or liters.
– Oil filter: Purchase a new oil filter that is compatible with your motorcycle’s model. Check the manufacturer’s specifications to avoid any mistakes.
– Oil drain pan: An oil drain pan is essential for catching the old oil as it drains from the engine. Ensure that it is large enough to accommodate the amount of oil your motorcycle holds.
– Funnel: A funnel will help you pour the new oil into the engine without spilling. Choose one that fits securely in the oil fill hole.
3. Miscellaneous:
– Shop rags or paper towels: These are useful for cleaning up spills and keeping your hands clean during the process.
– Personal protective equipment: Wear gloves and safety glasses to protect your hands and eyes from oil and debris.
– Container for old oil: Have a proper container to store the used oil until you can dispose of it according to local regulations.
After gathering all these tools and materials, you will be well-prepared to perform an oil change efficiently and safely. Proper preparation is key to avoiding any interruptions during the process.
Draining Old Oil and Replacing the Oil Filter Correctly

To maintain the performance and longevity of your motorcycle, draining the old oil and replacing the oil filter are crucial steps. Follow these detailed instructions to ensure proper execution.
Tools and Materials Needed

- Socket wrench set
- Oil filter wrench
- Drain pan
- New oil filter
- New engine oil
- Funnel
- Shop towels or rags
- Gloves and safety goggles
Steps to Drain Old Oil
- Prepare the Motorcycle: Ensure the motorcycle is on a level surface. Turn off the engine and allow it to cool completely to avoid burns.
- Locate the Oil Drain Plug: Find the oil drain plug, usually located at the bottom of the engine. Consult your owner’s manual if you’re unsure.
- Position the Drain Pan: Place the drain pan under the oil drain plug to catch the old oil.
- Remove the Drain Plug: Using the correct socket wrench, carefully loosen and remove the drain plug. Allow the old oil to completely drain into the pan.
- Inspect the Drain Plug: Check for any metal shavings or debris on the plug, which could indicate engine wear. Clean it with a rag and set it aside for reinstallation.
Replacing the Oil Filter
- Locate the Oil Filter: Identify the oil filter, which is typically cylindrical and may be near the engine oil pan.
- Remove the Old Filter: Use an oil filter wrench to loosen and remove the old oil filter. Be cautious, as some oil may spill out during removal.
- Prepare the New Filter: Before installing the new filter, apply a small amount of new oil to the rubber gasket on the top of the filter. This ensures a better seal.
- Install the New Filter: Screw the new filter onto the engine by hand until it is snug. Avoid over-tightening, as this can damage the filter.
After completing both steps, double-check that the drain plug is securely reinstalled and that there are no leaks from the oil filter. You are now ready to refill the motorcycle with new oil.
Filling with New Oil and Ensuring Proper Maintenance Checks
After draining the old oil, it’s time to fill the motorcycle with new oil. Begin by locating the oil filler cap, which is typically found on the right side of the engine. Remove the cap and, using a funnel, pour the recommended type and amount of oil into the engine. Consult the owner’s manual for the specific oil capacity and preferred oil grade for your motorcycle model. This ensures optimal engine performance and longevity.
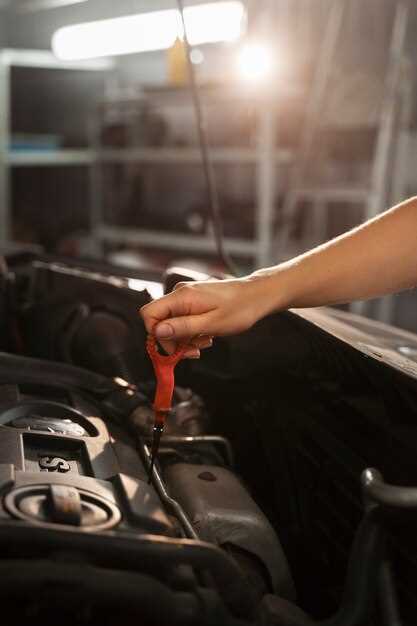
As you fill, periodically check the oil level using the dipstick or by inspecting the sight glass if your motorcycle has one. It’s crucial not to overfill, as excess oil can lead to foaming and inadequate lubrication. Once filled to the correct level, securely replace the oil filler cap.
After changing the oil, perform a series of maintenance checks to ensure everything is functioning correctly. Start the engine and allow it to idle for a few minutes. This allows the new oil to circulate through the engine, lubricating all necessary components. Observe for any leaks around the oil filter and drain plug; a small amount of oil may seep out initially, but significant leaks should be addressed immediately.
Once satisfied that there are no leaks, check the oil level one last time. Allow time for the oil to settle, then dip again to confirm it remains at the appropriate level. Regularly scheduled oil changes and checks on oil quality are essential; it is advisable to inspect the oil every 1,000 miles or at least once a month, adjusting this frequency based on your riding habits and conditions.
In addition to oil level checks, inspect the air filter, plugs, chain tension, and tires during each maintenance session. Keeping a log of service history can help track maintenance intervals and ensure that all components remain in good condition. Proper oil maintenance not only enhances engine performance but also extends the life of your motorcycle.