Blog

  • How to Choose the Right Tires for Mixed Terrain

    How to Choose the Right Tires for Mixed Terrain

    How to Choose the Right Tires for Mixed Terrain

    When it comes to navigating through diverse landscapes, the right set of tires can make all the difference. Mixed terrains–including gravel roads, muddy trails, and rocky paths–present unique challenges that require careful consideration when selecting tires. This article aims to simplify the tire selection process, ensuring that drivers can confidently tackle any terrain they encounter.

    Understanding Terrain Types is crucial for effective tire selection. Each type of terrain demands specific tire characteristics such as tread pattern, rubber composition, and sidewall strength. For instance, aggressive tread patterns are ideal for off-road conditions, as they provide better grip on loose surfaces, whereas smooth and rounded tread designs excel on paved roads, promoting fuel efficiency and comfort.

    Equipped with the right knowledge, you can evaluate your driving needs and choose the most suitable tires for varying conditions. By considering factors such as vehicle type, driving habits, and expected terrain, you can enhance both performance and safety on your journeys. This guide will walk you through the essential aspects of tire selection to ensure you make informed decisions tailored to your driving experiences.

    Understanding Terrain Types for Tire Selection

    When it comes to choosing the right tires, understanding different terrain types is crucial for optimizing performance and safety. Each terrain presents unique challenges, and tires must be tailored to meet these requirements effectively.

    1. Asphalt and Concrete: These surfaces are typically found in urban environments. Tires for this terrain are designed with a smooth tread pattern for better grip and reduced rolling resistance. Features like low noise levels and excellent wet traction are also important.

    2. Off-Road: For gravel, mud, or rocky paths, off-road tires are essential. They usually possess deep treads and reinforced sidewalls to provide traction and durability. Patterns with large voids help to displace mud and enhance grip on loose surfaces.

    3. Mixed Terrain: Mixed terrain tires strike a balance between on-road and off-road capabilities. They often feature a hybrid tread design, allowing for efficient performance on diverse surfaces. This versatility makes them ideal for drivers who transition between urban and rural settings.

    4. Snow and Ice: In winter conditions, tires specifically designed for snow and ice offer better traction and handling. These tires have specialized tread patterns and compounds that remain flexible in cold temperatures, improving grip on slippery surfaces.

    5. Sand: Sand terrain requires specialized tire designs with wide, paddle-like treads that prevent sinking. These tires help distribute the vehicle’s weight over a larger surface area, promoting flotation and allowing for easier maneuverability.

    Understanding these terrain types is fundamental in making an informed tire choice. Selecting the right tire can significantly enhance performance, safety, and overall driving experience across various conditions.

    Key Features to Look for in Mixed Terrain Tires
    Key Features to Look for in Mixed Terrain Tires

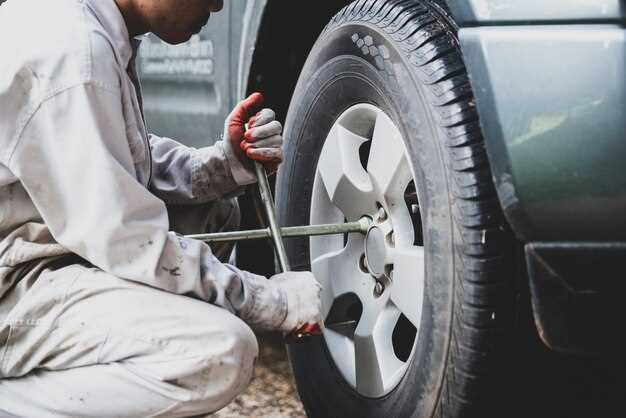
    When selecting tires for mixed terrain, several key features are essential to ensure optimal performance and safety. First and foremost, tread design plays a crucial role. Look for an aggressive tread pattern that includes large, widely spaced lugs, which provides enhanced traction on both loose and solid surfaces.

    Another important feature is rubber compound. A softer rubber compound offers better grip on rocky or muddy conditions while maintaining durability on pavement. Tires with a dual-compound structure can provide the best of both worlds, offering comfort and longevity.

    Sidewall strength is also crucial. Tires designed for mixed terrain typically feature reinforced sidewalls to withstand rough trails and obstacles. This reduces the risk of punctures and damage when navigating through rugged landscapes.

    Additionally, consider the tire’s size and aspect ratio. A wider tire can improve stability and flotation in loose surfaces like sand and mud, while a lower aspect ratio can provide better handling and response on paved roads. Make sure to choose a size that is compatible with your vehicle for optimal performance.

    Lastly, pay attention to the tire’s ability to self-clean. Tread patterns that allow mud and debris to escape will prevent clogging and maintain traction throughout your ride. This feature is particularly important in changing conditions, ensuring consistent performance.

    Maintenance Tips for Longevity of Mixed Terrain Tires
    Maintenance Tips for Longevity of Mixed Terrain Tires

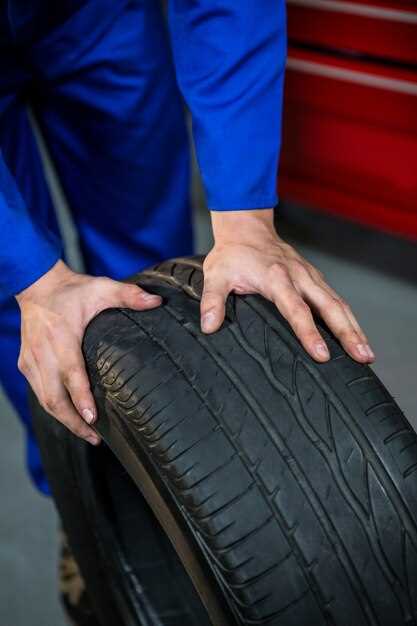
    To maximize the lifespan and performance of your mixed terrain tires, regular maintenance is essential. Here are some effective tips to ensure your tires remain in optimal condition.

    1. Regular Pressure Checks: Maintain the recommended air pressure for your tires. Under-inflated tires can lead to increased wear and reduced fuel efficiency, while over-inflation can decrease traction. Check tire pressure at least once a month.

    2. Rotate Tires Periodically: Rotate your tires every 5,000 to 7,500 miles or according to the vehicle manufacturer’s guidelines. This practice helps to ensure even wear across all tires, extending their overall lifespan.

    3. Inspect Tread Depth: Regularly check the tread depth to ensure it meets safety standards. Use the penny test: insert a penny into the tread with Lincoln’s head facing down; if you can see the top of his head, it’s time to replace your tires.

    4. Clean Tires Regularly: Remove dirt, mud, and debris that can accumulate in the tread. Cleaning your tires prevents the degradation of rubber and helps maintain traction, especially on mixed terrains.

    5. Avoid Overloading: Adhere to the weight limits specified by your vehicle manufacturer. Overloading can increase tire wear and lead to blowouts, particularly on varying surfaces.

    6. Drive Cautiously: Be mindful of your speed and driving style. Avoid sudden accelerations, hard braking, and sharp turns, especially on uneven terrain, as these actions can stress your tires.

    7. Store Properly: If you need to store your tires, keep them in a cool, dry place away from direct sunlight. If possible, store them standing up to prevent flat spots from developing.

    By following these maintenance tips, you can enhance the life and performance of your mixed terrain tires, allowing for better handling and safer driving across diverse conditions.

  • Best Crash Protection for Trail Riding

    Best Crash Protection for Trail Riding

    Best Crash Protection for Trail Riding

    When it comes to trail riding, ensuring safety is paramount. Riders navigate through challenging terrains that can lead to unexpected falls and accidents, making the right protective gear an essential component of any adventure. With advancements in technology and materials, today’s crash protection gear offers superior comfort and safety features tailored for trail enthusiasts.

    In this article, we will explore the top gear options specifically designed to minimize injury risks during trail rides. From helmets to body armor, each piece of equipment plays a pivotal role in safeguarding riders against potential accidents. The right gear not only enhances the overall riding experience but also boosts confidence, allowing riders to tackle tougher trails with peace of mind.

    Understanding the importance of each protective item is crucial. Helmets provide vital head protection, while knee and elbow pads guard against joint injuries. Additionally, protective vests designed for impact absorption can significantly reduce the risk of torso injuries. With a wide range of options available, it’s essential to choose gear that fits well and meets safety standards to ensure maximum protection on the trails.

    Choosing the Right Helmet for Trail Riding

    Choosing the Right Helmet for Trail Riding

    Selecting the right helmet is crucial for ensuring safety while trail riding. The helmet should meet safety standards such as DOT, Snell, or ECE, indicating that it has passed rigorous testing. Look for a helmet that fits snugly without being uncomfortable. It should sit level on your head, with the front edge just above your eyebrows and the back touching the base of your skull.

    Consider the type of trail riding you will be doing. For more rugged terrain, a full-face helmet may provide better protection, while an open-face helmet might suffice for leisurely rides on less challenging trails. Ventilation is another important factor. A well-ventilated helmet will keep you cool and comfortable during long rides.

    Weight is also a consideration. A lighter helmet reduces strain on your neck during extended periods of wear. Additionally, pay attention to the interior padding; removable and washable padding can enhance hygiene and comfort.

    Lastly, do not overlook the importance of visibility. A helmet with reflective elements can improve your visibility in low light conditions, enhancing safety on trails that may have variable exposure to sunlight. Choose a color that stands out, making it easier for others to spot you.

    Understanding the Importance of Body Armor and Pads

    Understanding the Importance of Body Armor and Pads

    Body armor and pads play a crucial role in ensuring the safety of trail riders by providing essential protection against impact and abrasion. The nature of trail riding often involves exposure to unpredictable terrain, which increases the risk of falls and collisions. Properly designed body armor absorbs shock and minimizes the risk of fractures or serious injuries in the event of an accident.

    Supportive pads, such as knee and elbow protectors, enhance rider confidence by allowing for greater freedom of movement while maintaining safety. These pads are usually made from flexible materials that easily conform to the body, allowing riders to maneuver freely without feeling restricted. The right fit ensures maximum effectiveness, so it’s important to select gear that is specifically tailored to individual body shapes and sizes.

    Many body armor options also incorporate ventilation systems, which help regulate body temperature during long rides. This feature can significantly enhance comfort, as overheating can lead to fatigue and decreased focus, increasing the likelihood of mishaps on the trail. Moreover, some armor models offer moisture-wicking technology that keeps the skin dry, further improving rider comfort over prolonged periods.

    Investing in high-quality body armor and pads is essential for both amateur and experienced riders. These protective gears are designed not only for impact resistance but also for overall durability. In rigorous conditions, cheap or ill-fitting gear can fail, rendering it ineffective when it is needed most. Therefore, selecting reliable brands and products that meet safety standards is vital for ensuring optimal protection.

    In summary, understanding and utilizing body armor and pads is key to enhancing safety during trail riding. By prioritizing this protective gear, riders can significantly reduce the risk of injury, allowing them to enjoy the adventure with greater peace of mind.

    Selecting Appropriate Footwear for Maximum Protection

    When it comes to trail riding, your choice of footwear plays a crucial role in ensuring maximum safety and comfort. Proper footwear not only protects your feet from potential injuries but also enhances your overall riding experience. Here are several key factors to consider when selecting the most suitable footwear for trail riding:

    • Material:

      Opt for durable materials that offer abrasion resistance and waterproof capabilities. Leather, synthetic fabrics, and rubber are excellent choices as they provide both longevity and protection against the elements.

    • Fit:

      Choose a snug fit without being overly tight. Proper fit minimizes the risk of blisters and enhances control while riding. Ensure your footwear allows for adequate toe movement and does not pinch or restrict circulation.

    • Support:

      Look for boots that provide ample ankle support to prevent sprains and other injuries. This is especially important when navigating rocky or uneven terrain.

    • Grip:

      The outsole should have a reliable tread pattern that provides excellent traction on different surfaces. A good grip is essential when mounting, dismounting, and navigating slippery or steep trails.

    • Protection features:

      Select footwear with reinforced toe caps and heel counters to guard against impacts. Some boots also offer additional padding around the ankles for extra protection.

    • Breathability:

      Consider footwear with breathable materials or ventilation systems to keep your feet cool and comfortable during long rides, reducing the risk of blisters.

    • Water Resistance:

      Waterproof boots are essential for riding in wet conditions, as they keep your feet dry and prevent discomfort that can lead to loss of control while riding.

    By taking these factors into account, you can select footwear that not only maximizes protection but also enhances your trail riding experience. Remember, your safety and comfort depend significantly on the quality and suitability of your riding boots.

  • How to Set Sag for Your Weight and Riding Style

    How to Set Sag for Your Weight and Riding Style

    How to Set Sag for Your Weight and Riding Style

    When it comes to optimizing your motorcycle’s suspension, understanding and setting the right sag is crucial. Sag is the amount that your bike compresses when you sit on it, and it directly affects handling, comfort, and stability. Proper sag settings allow your suspension to function as intended, delivering a ride that feels balanced and responsive.

    Different riders have varying weights, body types, and riding styles, all of which can influence the ideal sag measurement. For instance, a heavy rider may need to adjust their sag settings differently than a lighter individual to achieve the same level of performance. Moreover, the type of riding–whether it’s aggressive cornering on a racetrack or cruising on a scenic route–can also dictate the appropriate sag range.

    In this article, we will delve into the factors that affect sag, how to measure it accurately, and tips on adjusting your bike’s suspension settings. Whether you’re a seasoned rider or just starting, setting the right sag is essential for maximizing your riding experience and ensuring safety on the road.

    Understanding Static and Dynamic Sag Measurements

    Proper sag settings are critical for optimal suspension performance in any riding discipline. Sag measurements are divided into two categories: static sag and dynamic sag. Each serves a unique purpose and understanding both is essential for achieving the right balance in your bike’s setup.

    Static sag is the amount of suspension travel that is used when the bike is at rest, excluding rider weight. To measure static sag, follow these steps:

    • Ensure the bike is on a flat surface and remove the rider from the bike.
    • Measure the distance from a fixed point on the rear axle or shock body to a point on the frame.
    • Next, compress the suspension by pushing down on the rear end and measure the new distance under the same parameters.
    • Subtract the compressed measurement from the uncompressed measurement to obtain your static sag.

    Static sag is a crucial indicator of spring stiffness. Generally, a static sag between 10-20% of total suspension travel is recommended. Having too little static sag can lead to harshness over bumps, while too much can result in a bike that feels overly soft and unresponsive.

    Dynamic sag, on the other hand, measures how much the suspension compresses under rider weight during normal use. This measurement accounts for rider movements and forces while riding. To measure dynamic sag, follow these steps:

    • First, put on all your riding gear, as this adds weight that will affect the measurements.
    • Position yourself on the bike in your normal riding stance, and have someone else measure the same fixed points as in the static sag measurement.
    • Again, note the distance from the point on the rear axle or shock body to the frame, both before and after sitting on the bike.
    • Subtract the compressed measurement from the uncompressed one to determine your dynamic sag.

    A typical dynamic sag measurement falls between 25-35% of total travel. This value helps ensure that your suspension can respond effectively to terrain changes while providing adequate support during various riding scenarios.

    In summary, both static and dynamic sag play vital roles in fine-tuning suspension performance. Understanding how to measure and interpret these values allows riders to set their bikes up to meet both personal preferences and riding conditions effectively.

    Adjusting Your Suspension Based on Riding Conditions

    Adjusting Your Suspension Based on Riding Conditions

    To optimize performance and enhance your riding experience, adjusting your suspension is crucial depending on varying riding conditions. Each environment presents unique challenges that require specific suspension settings.

    Off-Road Riding: In off-road conditions, where terrain varies significantly with bumps, roots, and rocks, a softer suspension setup is often beneficial. This allows the vehicle to absorb shocks better and maintain traction on uneven surfaces. Consider decreasing the compression dampening and increasing the rebound setting for more control as the suspension resets after hitting obstacles.

    Trail Riding: For trail riding, where technical maneuvers and precision handling are essential, a balanced setup is key. A moderate compression setting paired with an adjustable rebound can help maintain stability without sacrificing sensitivity. This adjustment enables quick responses to changes in the trail while providing comfort over longer distances.

    High-Speed Riding: On smoother and faster terrain, such as racetracks or open roads, a stiffer suspension is preferable. This reduces excessive body roll and improves cornering stability. Increasing both compression and rebound dampening can enhance control at high speeds, ensuring your vehicle remains grounded and responsive during quick maneuvers.

    Wet or Slippery Conditions: When riding in wet or slippery conditions, it is wise to adjust the suspension to provide more grip. A softer setup can help the tires maintain contact with the ground, improving traction. Lowering the suspension height slightly can also aid stability and prevent sliding.

    Load Variation: If you’re riding with additional gear or carrying a passenger, adjusting sag is vital. Increasing the preload on your suspension compensates for the extra weight, ensuring handling is not compromised. This adjustment keeps the bike balanced and responsive to input.

    In conclusion, understanding the impact of different riding conditions on your suspension can significantly improve performance and safety. Regularly assessing and adjusting your suspension settings based on anticipated conditions is an essential practice for any serious rider.

    Common Mistakes to Avoid When Setting Sag

    Common Mistakes to Avoid When Setting Sag

    Setting sag correctly is crucial for optimal bike performance and rider comfort, yet there are common pitfalls that can lead to inaccurate results. One significant mistake is neglecting to account for riding gear, which can add extra weight and affect the suspension’s setup. Always wear your full kit, including helmet, boots, and protective gear when measuring sag.

    Another frequent error is failing to obtain accurate measurements. It’s essential to measure sag consistently from the same point on the bike to avoid discrepancies. Moreover, using a measuring device that is difficult to read can lead to miscalculations; a simple zip tie or a dedicated sag meter can facilitate more precise readings.

    Riders often set sag only for one riding position or while stationary, disregarding how their weight shifts during dynamic riding. Ensure to check sag in a riding position that reflects your usual posture when in motion. Additionally, some riders do not adjust sag to match varying riding styles, such as aggressive cornering or rough terrain. Adjustments may be necessary depending on your riding conditions.

    Another mistake is not considering the suspension’s response after setting the sag. Poor initial settings can lead to an unbalanced feel, making it vital to take the bike for a test ride post-adjustment. Pay attention to how the bike behaves under loads and readjust if necessary.

    Finally, many overlook the benefits of consulting their bike’s manual or a professional. Each bike and suspension system may have specific recommendations for sag settings based on its design. Proper guidance can save time and enhance the riding experience.

  • Battery Basics – Charging, Testing, and Replacing

    Battery Basics – Charging, Testing, and Replacing

    Battery Basics – Charging, Testing, and Replacing

    Batteries are an essential component in our daily lives, powering everything from smartphones to electric vehicles. Understanding how to properly charge, test, and replace batteries can enhance their lifespan and performance, ultimately saving time and money. This guide aims to equip you with the knowledge needed to manage your batteries effectively.

    Charging a battery correctly is crucial to ensure its longevity and efficiency. Using the right charger and following recommended charging cycles can prevent overcharging and overheating, which are common issues leading to battery damage. Additionally, becoming familiar with the types of batteries and their specific requirements is vital for proper maintenance.

    Testing batteries is equally important, as it allows you to determine their health and performance levels. Various tools and methods exist for assessing battery capacity and voltage, and knowing when to test can prevent unexpected failures. Understanding the signs of a failing battery will empower you to make informed decisions about when to replace them.

    Finally, knowing how to replace batteries safely and efficiently is a skill that can save you from unnecessary frustration. Whether dealing with rechargeable batteries or traditional ones, it’s important to understand the proper handling techniques and disposal requirements to minimize environmental impact.

    Understanding Battery Types and Their Charging Requirements

    Understanding Battery Types and Their Charging Requirements

    When it comes to battery technology, various types have distinct characteristics and charging needs. Understanding these differences is essential for optimal performance and longevity. The most common battery types include lithium-ion (Li-ion), nickel-metal hydride (NiMH), and lead-acid batteries.

    Lithium-ion batteries are prevalent in modern devices due to their high energy density and lightweight nature. These batteries require a specific charging voltage and current, typically ranging from 4.2 volts for a full charge. Fast charging is possible with smart chargers that adjust the current according to the battery’s state of charge. Overcharging can lead to overheating and significantly shorten lifespan, making protective circuitry crucial.

    Nichol-metal hydride batteries, commonly found in hybrid vehicles and rechargeable electronics, have a lower energy density compared to Li-ion but are more environmentally friendly. They require a charging voltage of approximately 1.4 volts per cell. NiMH batteries can suffer from a phenomenon known as “memory effect,” where they lose their maximum charge capacity if not fully discharged before recharging. Therefore, it is beneficial to allow periodic deep discharges to maintain optimal performance.

    Lead-acid batteries, often used in automotive applications and backup power systems, consist of two main types: flooded and sealed (AGM or GEL). Flooded lead-acid batteries require regular maintenance, including checking electrolyte levels and are typically charged at around 2.4 to 2.45 volts per cell. Sealed lead-acid batteries can be charged at similar voltages but do not require maintenance. Care should be taken to prevent overcharging, as it can result in water loss and reduced battery life.

    In summary, each battery type has unique charging requirements that must be followed to ensure safety and performance. Understanding these requirements can help users maximize their battery’s efficiency and lifespan.

    Step-by-Step Process for Testing Battery Health

    Step-by-Step Process for Testing Battery Health

    Testing battery health is essential to ensure that it operates efficiently and provides reliable performance. Follow these steps to accurately assess battery health:

    Step 1: Gather Necessary Tools

    Before beginning the testing process, ensure you have the right tools. You will need a multimeter, a battery tester, and, if applicable, the manufacturer’s specifications for voltage and capacity.

    Step 2: Ensure Safety Precautions

    Always prioritize safety when handling batteries. Wear gloves and goggles, and work in a well-ventilated area. If the battery is swollen, leaking, or damaged, handle it with extreme care or consult a professional.

    Step 3: Remove the Battery

    For removable batteries, carefully take them out from the device according to the manufacturer’s instructions. If the battery is sealed, proceed cautiously and consider using a multimeter to test it in place.

    Step 4: Visual Inspection

    Inspect the battery for any visible signs of damage, such as corrosion, swelling, or leakage. These signs can indicate underlying issues that may affect performance.

    Step 5: Measure Voltage with a Multimeter

    Set your multimeter to the DC voltage setting. Connect the multimeter probes to the battery terminals–red to positive and black to negative. Compare the measured voltage to the battery’s rated voltage from the manufacturer. A significant drop suggests reduced battery health.

    Step 6: Conduct a Load Test

    Using a battery tester, apply a load that is appropriate for the battery type. This test simulates the battery’s performance under normal operating conditions. Maintain the load for a specific duration (typically 10-15 seconds) and observe the voltage drop. If the voltage falls below the recommended level, the battery may need replacement.

    Step 7: Check Capacity

    If available, use a capacity tester to measure the battery’s amp-hour (Ah) rating. Charge the battery fully, then discharge it under a controlled load while monitoring the time taken. Compare the discharge capacity to the original specifications. A significant decrease indicates diminished health.

    Step 8: Analyze Results

    Evaluate all the findings from the visual inspection, voltage measurement, load test, and capacity test. If multiple tests indicate poor performance, it’s advisable to replace the battery for optimal reliability.

    Step 9: Reinstall or Dispose Properly

    If the battery is in good condition, carefully reinstall it into the device. If it is deemed unhealthy, dispose of it properly at a recycling center or follow local disposal guidelines.

    By following these steps, you can effectively test the health of a battery and determine whether it requires charging, servicing, or replacement.

    How to Properly Replace Batteries in Common Devices

    Replacing batteries in common devices is essential for maintaining their optimal performance. Here are the steps to ensure a successful battery replacement.

    First, identify the type of battery used in your device. Common types include AA, AAA, 9V, and rechargeable lithium-ion batteries. Check the device’s manual or the existing battery for specifications.

    Next, gather the necessary tools. Most battery replacements require little more than your hands, but some devices may need a screwdriver or a prying tool to access the battery compartment.

    Before opening the device, ensure it is powered off. This prevents any electrical shorts or damage during the replacement process. If the device has a removable battery, locate the latch or cover that secures it. Slide, press, or unclip it carefully to access the battery compartment.

    Remove the old battery, taking care to note its orientation. Batteries typically have a positive (+) and negative (-) end; installing the new battery incorrectly can harm the device.

    Take the new battery, ensuring it is the correct type and fully charged if it is rechargeable. Insert it into the compartment, aligning it with the positive and negative markings. Firmly press it down to ensure a secure connection.

    Once the new battery is in place, reattach the battery cover or compartment door. Make sure it clicks or locks into place to prevent it from opening during use.

    Finally, power on the device to test its functionality. If it does not turn on, double-check the battery orientation and connections. Properly disposing of the old battery is also crucial; follow local regulations for recycling or disposal.

  • Top Track Mods for Your Motorcycle

    Top Track Mods for Your Motorcycle

    Top Track Mods for Your Motorcycle

    Enhancing the performance of your motorcycle on the track requires a strategic approach that balances power, handling, and rider comfort. Various modifications can take your bike to the next level, optimizing its capabilities for track days and competitive racing. This guide will delve into the best motorcycle track mods that can significantly boost your performance.

    One of the primary areas to focus on is the suspension system. Upgrading your suspension can lead to better stability and handling through corners, allowing for higher cornering speeds and improved feedback from the road. High-quality suspension components, such as adjustable forks and shock absorbers, help fine-tune your motorcycle’s response to track conditions.

    Another critical modification to consider is weight reduction. Reducing the overall weight of your motorcycle not only enhances acceleration but also improves braking and cornering performance. This can be achieved by replacing heavy components with lighter alternatives, such as carbon fiber fairings or a lithium-ion battery. Additionally, removing any unnecessary parts can help streamline your bike for a more agile performance.

    Finally, enhancing your braking system is essential for track performance. Upgrading to high-performance brake pads and rotors can significantly improve stopping power and reduce braking distance, allowing for greater confidence when entering corners at high speeds. Investing in a radial master cylinder can further enhance brake feel and modulation, making your riding experience safer and more enjoyable.

    Optimizing Suspension Settings for Superior Cornering

    To achieve superior cornering performance on a motorcycle, fine-tuning suspension settings is crucial. Proper adjustments not only enhance stability but also improve grip and responsiveness through corners. Start by setting your motorcycle’s sag, a critical measurement that affects how the bike sits under load. Aim for 30-35mm of sag for the rear and slightly less for the front. Use a measuring tape to assess the distance from the rear axle to a fixed point on the bike after sitting on it.

    Next, adjust the compression and rebound damping. Compression damping controls how quickly the suspension compresses when hitting bumps, while rebound damping manages how fast it returns to its original position. For cornering, a slightly stiffer compression setting will help prevent bottoming out during aggressive lean angles. However, don’t overdo it; excessive stiffness can lead to a harsh ride. A good starting point is about 2-3 clicks stiffer on the compression for the front and rear.

    On the rebound side, aim for a setting that allows the suspension to return smoothly without causing a bounce. If your motorcycle feels unsettled after hitting a bump, it may need more rebound damping. Fine-tune both settings incrementally, testing each adjustment to find the sweet spot that provides stability and comfort.

    Furthermore, ensure that the fork oil level is correct and the oil itself is new, as this plays a pivotal role in how your suspension performs. Consider upgrading to aftermarket fork springs tailored to your weight and riding style if you consistently find the stock springs inadequate for your needs.

    Finally, remember to maintain proper tire pressure, as it directly influences how your suspension behaves. A balanced tire setup complements your suspension adjustments and enhances cornering grip. Monitor and adjust tire pressure according to the manufacturer’s recommendations based on your riding conditions.

    By meticulously optimizing these suspension settings, you will experience improved cornering capability, providing greater confidence and control during your rides.

    Choosing the Right Tires for Maximum Grip

    Choosing the Right Tires for Maximum Grip

    When it comes to enhancing performance on the track, selecting the right tires is crucial for achieving maximum grip. Tires are the only contact point between your motorcycle and the track surface, making their quality and specifications vital for optimized handling and stability.

    Tire Composition: The rubber compound used in tire construction significantly affects grip levels. Softer compounds provide better traction, especially at higher temperatures, but they tend to wear out faster. Conversely, harder compounds offer increased durability but may sacrifice some grip. Understanding the balance between softness and longevity is essential for your specific racing needs.

    Tread Patterns: The design of the tire tread plays an important role in grip. Slick tires, which have no tread, are ideal for dry conditions as they maximize contact area with the track. However, if you frequently encounter wet conditions, tires with specific tread patterns are necessary to channel water away and maintain grip. Always choose tires compatible with the riding conditions you expect.

    Tire Size: Proper tire dimensions influence both handling and grip. Wider tires create a larger contact patch, enhancing overall traction. However, they might also affect steering responsiveness. It’s crucial to select a tire size that complements your motorcycle’s specifications and riding style to ensure efficient performance.

    Temperature Management: Tire grip is also temperature-sensitive. Optimal operating temperatures allow tires to perform at their best. Warm-up laps are essential for achieving suitable temperatures. Invest in tire warmers if your race conditions allow, as they can help maintain the ideal temperature from the outset, enhancing grip right from the start.

    User Reviews and Testing: Before committing to any tire brand or model, consider user reviews and professional tests. Feedback from experienced riders can provide insights into how tires perform under specific conditions. Look for tires that have been proven effective in similar racing environments for your motorcycle type.

    In conclusion, choosing the right tires involves a careful evaluation of compound, tread pattern, size, and temperature management. Prioritizing these factors can dramatically enhance your motorcycle’s grip and overall performance on the track.

    Upgrading Brake Systems for Improved Stopping Power

    Upgrading Brake Systems for Improved Stopping Power

    Upgrading the brake system is a crucial modification for enhancing the performance of any motorcycle on the track. Excellent braking is essential for maintaining control and maximizing lap times. Several key components contribute to improved stopping power, allowing riders to brake later and harder during races.

    Brake Pads: High-performance brake pads made from advanced materials, such as carbon-ceramic or sintered metals, provide superior friction levels. These pads are designed to withstand high temperatures and maintain performance under extreme conditions. Upgrading to race-spec pads can significantly enhance initial bite and modulation, crucial for precise braking control.

    Brake Rotors: Switching to larger or lightweight brake rotors can further improve braking efficiency. Larger rotors increase the surface area for heat dissipation and enhance the overall braking power. Floating rotors can also enhance performance by allowing for slight movements during braking, reducing distortion and improving feel.

    Brake Calipers: High-performance calipers usually feature increased piston sizes and additional pistons, leading to improved clamping force on the rotor. Upgrading to multi-piston calipers offers more consistent braking performance and better modulation. Consider calipers made from lightweight materials such as aluminum to reduce unsprung weight.

    Brake Lines: Replacing stock rubber brake lines with aftermarket stainless steel braided lines enhances brake feel and responsiveness. These lines resist expansion under pressure, ensuring a firmer and more instantaneous connection between the lever and calipers, which translates to better stopping performance.

    Master Cylinder: An upgraded master cylinder can provide a more direct and responsive feel at the brake lever. Look for models with adjustable lever ratios, which can be tuned to the rider’s preference, offering customizable braking sensations depending on riding style.

    Proper maintenance is crucial after upgrading components. Regular checks of the brake system ensure consistent performance and reliability. With these enhancements, riders will experience significantly improved stopping power, enhancing both safety and confidence on the track.

  • Tips for Riding in Stop-and-Go Traffic

    Tips for Riding in Stop-and-Go Traffic

    Tips for Riding in Stop-and-Go Traffic

    Navigating through stop-and-go traffic can be one of the most challenging aspects of riding a motorcycle. The constant changes in speed, along with the proximity of vehicles on all sides, require heightened awareness and a specific set of strategies to ensure safety.

    In this article, we will delve into effective techniques that every rider can adopt to enhance their safety in congested conditions. Understanding the behavior of surrounding vehicles, maintaining proper spacing, and anticipating sudden stops are crucial elements to mastering the art of riding in heavy traffic.

    Moreover, we will explore the importance of gear selection, body positioning, and situational awareness. By implementing these strategies, riders can significantly reduce the risks associated with stop-and-go scenarios, making their journeys not only safer but also more enjoyable.

    Maintaining Proper Distance Between Vehicles

    In stop-and-go traffic, maintaining a safe distance between vehicles is crucial for preventing collisions and ensuring smooth traffic flow. The general rule is to keep at least a two-second gap between your vehicle and the one in front of you. This distance allows sufficient reaction time in case the car ahead suddenly brakes or stops.

    To measure this distance, select a stationary object along the road, such as a traffic sign or a pole. When the vehicle in front of you passes the object, count “one thousand and one, one thousand and two.” If you reach the object before completing the count, you are too close. Adjust your distance accordingly.

    In addition to the two-second rule, consider increasing the gap in adverse weather conditions or when driving a larger vehicle. Rain, snow, or fog can significantly reduce traction and visibility, requiring more time to react. Similarly, larger vehicles have longer stopping distances due to their weight, making it essential to maintain a greater distance from them.

    Be mindful of the traffic around you. If you find yourself surrounded by aggressive drivers or frequent lane changers, it might be wise to increase your following distance further. This extra space can provide a buffer against unexpected maneuvers from other vehicles, enhancing your safety on the road.

    Utilizing advanced driver-assistance systems (ADAS) available in modern vehicles can aid in maintaining the correct distance as well. Cruise control functions, especially adaptive cruise control, can automatically adjust your speed based on the vehicles ahead, helping you stay within a safe range without constant manual adjustments.

    Remember, maintaining a proper distance not only ensures your safety but also contributes to overall traffic efficiency. By preventing sudden stops and collisions, drivers can minimize delays and promote a smoother driving experience for everyone.

    Understanding the Importance of Signaling and Rearview Checks

    Understanding the Importance of Signaling and Rearview Checks

    In stop-and-go traffic, maintaining clear communication with other drivers is crucial for safety. Signaling your intentions, whether changing lanes or preparing to stop, provides vital information to those around you. It helps prevent misunderstandings that can lead to accidents. Even in slow-moving conditions, the unpredictability of other vehicles makes signaling an essential part of defensive driving.

    Checking your rearview mirrors is equally important. This action enables you to remain aware of your surroundings and anticipate the movements of vehicles behind you. In stop-and-go scenarios, cars may approach rapidly, and being aware of their position allows you to react appropriately. Regularly checking mirrors helps identify tailgaters and provides insights into when it might be safe to change lanes or merge.

    Combining proper signaling with consistent rearview checks fosters a safer driving environment. It minimizes the chances of collisions and ensures that you remain in control of your vehicle at all times. Developing these habits contributes not only to your safety but also to that of other road users, creating a more predictable traffic flow.

    In summary, the significance of signaling and conducting rearview checks can’t be overstated in stop-and-go traffic situations. These practices enhance awareness and communication, reducing the likelihood of accidents and ensuring a smoother travel experience for everyone on the road.

    Adjusting Speed and Anticipating Sudden Stops

    In stop-and-go traffic, the ability to adjust your speed and anticipate sudden stops is crucial for maintaining safety. One of the key strategies is to monitor the behavior of vehicles ahead of you. Watching brake lights and the spacing between vehicles can provide valuable clues about upcoming stops.

    Maintain a safe following distance to give yourself ample time to react. A good rule of thumb is to keep at least two to three seconds of space between you and the vehicle in front. This distance may need to be increased during adverse weather conditions or when driving larger vehicles.

    When you notice traffic beginning to slow down, begin to decelerate smoothly rather than slamming on the brakes. This gradual approach not only reduces the risk of rear-end collisions but also ensures that those behind you have adequate time to respond to your speed change. Implementing gradual braking allows for a smoother flow of motion and enhances overall safety for everyone on the road.

    Additionally, be aware of potential distractions that could impede your reaction time. Keeping your focus on the road and minimizing distractions will help you react quickly to sudden changes in traffic flow. Always be prepared for the unexpected, as drivers may abruptly stop or slow down without warning.

    Utilizing your engine to assist in the deceleration process can also be beneficial. Downshifting to a lower gear when facing gradual stops can help slow your vehicle down and reduce reliance on brakes, which can overheat and become less effective during heavy traffic.

    Lastly, staying calm and composed in slow-moving traffic can aid in better decision-making. If you can anticipate the flow of traffic and respond to it rather than react to each individual stop, you will enhance your safety and that of others on the road.

  • Best Heated Gear for Cold-Weather Riders

    Best Heated Gear for Cold-Weather Riders

    Best Heated Gear for Cold-Weather Riders

    When the temperature drops and the chill of winter settles in, riding a motorcycle can become a daunting task. Cold weather not only affects comfort but can also impact safety and performance. Fortunately, technology has advanced to provide riders with a range of heated gear that can significantly enhance their experience during those frosty rides.

    Heated gear is designed to combat the biting cold, ensuring that riders can maintain warmth without sacrificing mobility or control. Utilizing battery-powered heating elements, these products generate warmth directly against the body, providing targeted heat to key areas vulnerable to cold weather such as the core, hands, and feet. In this article, we will delve into the top heated gear options available for cold weather riding, ensuring you stay warm and focused on the road ahead.

    Understanding the various types of heated gear is essential for any rider looking to brave the elements. From heated vests and gloves to insoles and jackets, the right gear can make a significant difference in your riding experience. We will explore the features, benefits, and specifications of each type, providing you with the knowledge to make informed decisions for your chilly adventures.

    Choosing the Right Heated Jacket for Maximum Comfort

    When selecting a heated jacket for cold weather riding, several factors come into play to ensure maximum comfort. First, consider the heating elements. Look for jackets with strategically placed heating zones, typically located in the core areas such as the chest and back. This setup helps to distribute warmth evenly and effectively, keeping the body warm without overheating.

    Next, pay attention to the insulation material. A quality heated jacket should combine heating technology with effective thermal insulation. Look for options that include materials like down or synthetic fibers, which provide excellent heat retention while remaining lightweight.

    Power source versatility is another critical aspect. Opt for jackets that can be powered by rechargeable batteries or, in some cases, even compatible with your bike’s electrical system. This flexibility can extend your riding time while ensuring that your jacket remains functional during longer trips.

    Fit and comfort are essential as well. Choose a jacket that allows for a full range of motion without being too bulky. A snug fit can help trap body heat effectively, but make sure it isn’t restrictive, especially if you plan to wear layers underneath. Additionally, features like adjustable cuffs and hoods can enhance overall comfort, providing a customized fit.

    Finally, consider the jacket’s weather resistance. A quality heated jacket should be both water-resistant and windproof, as these elements can significantly impact your riding experience. Look for jackets that have sealed seams and durable materials designed to withstand harsh weather conditions.

    Understanding Battery Life and Heating Settings in Heated Gloves

    Understanding Battery Life and Heating Settings in Heated Gloves

    When investing in heated gloves for cold weather riding, understanding the battery life and heating settings is crucial for optimizing your experience. Heated gloves typically operate on rechargeable lithium-ion batteries, which offer varying performance based on the glove model and the intensity of heat settings used.

    Battery life is an essential factor to consider, as it directly impacts how long you can enjoy warmth during your ride. Most heated gloves come with multiple heat settings, usually categorized as low, medium, and high. On the low setting, gloves can last anywhere from 6 to 8 hours, making them suitable for longer rides in mildly cold conditions. Medium settings often provide around 3 to 6 hours of heat, while high settings can drain the battery within 2 to 4 hours, making them ideal for extreme cold but less practical for extended use.

    It’s essential to assess the intended duration of your rides when choosing heated gloves. Riders who plan on longer outings should prioritize gloves with longer battery life or consider carrying spare batteries. Additionally, some brands offer gloves with smart technology that allows users to monitor battery levels via mobile apps, providing real-time feedback on remaining power and estimated usage time based on the current heating setting.

    Heating settings are not only about comfort; they also play a role in energy conservation. Utilizing the low setting during less extreme cold can preserve battery life, ensuring that you have sufficient warmth for the entire ride. Conversely, using high heat in severe conditions can provide immediate relief but requires careful management to avoid depleting the battery too quickly.

    In summary, understanding battery life and efficiently managing heating settings are vital for maximizing the benefits of heated gloves. Consider your riding habits, the typical duration in cold weather, and choose gloves that fit your lifestyle while maintaining optimal warmth throughout your adventures.

    Selecting Heated Base Layers to Enhance Riding Experience

    Selecting Heated Base Layers to Enhance Riding Experience

    When it comes to riding in cold weather, having the right base layers can significantly improve comfort and performance. Heated base layers are designed to provide consistent warmth, ensuring that riders stay cozy even in frigid conditions. Selecting the right heated base layers involves considering multiple factors such as material, fit, battery life, and heating zones.

    The material of heated base layers is crucial for both insulation and moisture management. Look for fabrics that are lightweight yet provide excellent thermal protection. Common materials include polyester blends that wick moisture away from the skin while retaining heat. Additionally, base layers made of merino wool can offer natural insulation properties and breathability, making them an appealing option for cold-weather riding.

    Fit is another important aspect. Heated base layers should have a snug yet comfortable fit to maximize heat retention while preventing bulkiness under riding gear. A streamlined design will not only enhance mobility but also ensure that heat is efficiently distributed across the body. It’s advisable to try on various brands and styles to find the best fit for your specific riding posture.

    Battery life is a significant consideration when choosing heated base layers. Riders should look for garments with long-lasting batteries that can provide adequate warmth throughout their rides. Many products offer multiple heat settings, allowing users to adjust the intensity based on their environment and personal preference. Always check the estimated runtime and charging time to ensure that the layers meet your riding schedule.

    Heating zones are also worth examining. Different products feature varying configurations of heating elements, usually placed across key areas such as the back, chest, and core. A base layer with strategically positioned heating zones will effectively target critical areas to keep your body warm. Some layers may even include additional features, such as heating pads for the lower back and neck, enhancing overall comfort during long rides.

    In conclusion, selecting the right heated base layers is essential for enjoying cold-weather riding. Focus on high-quality materials, ensure a proper fit, consider battery life, and evaluate heating zones to elevate your riding experience. Investing in well-designed heated base layers will keep you warm and allow you to fully enjoy your time on the road, even in the harshest conditions.

  • How to Build a Budget Cafe Racer

    How to Build a Budget Cafe Racer

    How to Build a Budget Cafe Racer

    Creating a cafe racer is an exhilarating journey that combines passion, creativity, and mechanical prowess. Many enthusiasts dream of owning a customized bike that reflects their unique style while delivering a thrilling riding experience. However, the misconception that building a dream bike requires a hefty budget often discourages aspiring builders. The good news is that with careful planning and resourcefulness, you can create your ultimate cafe racer without breaking the bank.

    The key to building a budget-friendly cafe racer lies in understanding your priorities and knowing where to allocate your resources. Start by selecting a reliable base motorcycle that fits your vision. Popular choices include older models with classic lines, such as the Honda CB series or the Yamaha XS. These bikes often come at a lower price point and provide a sturdy foundation for your customizations.

    As you embark on this exciting project, remember that creativity can often fill the gaps where cash may fall short. Whether it’s sourcing parts from online marketplaces, visiting local salvage yards, or even tackling some of the modifications yourself, your vigilance and inventiveness will be your greatest allies. Embrace the challenge and enjoy the satisfaction that comes with building a truly unique bike that reflects your personality and style.

    Choosing the Right Base Motorcycle for Your Cafe Racer Project

    Choosing the Right Base Motorcycle for Your Cafe Racer Project

    When embarking on a cafe racer project, selecting the right base motorcycle is crucial for ensuring both a successful transformation and adherence to your budget. The ideal candidate should blend affordability, availability of parts, and classic styling. Here are some key considerations to guide your decision.

    1. Popular Models: Look for motorcycles that have a strong following within the cafe racer community. Models such as the Honda CB series, Yamaha XS series, and Suzuki GS series are often favored due to their timeless designs and plentiful spare parts. These bikes are not only budget-friendly but also have a plethora of customization options.

    2. Engine Size: Consider the engine displacement that aligns with your riding preferences. Smaller engines (250cc-650cc) can offer a lighter, more nimble ride, making them ideal for urban commuting. In contrast, larger engines (750cc and above) deliver more power for those who enjoy longer rides or highway speeds.

    3. Condition: Assess the mechanical and structural condition of the motorcycle. A bike in good shape will require less immediate work and expense. Pay attention to the frame, as a solid backbone is essential for safety and modifiability. Rust, dents, and structural damage can pose significant challenges.

    4. Ease of Customization: Choose a model that lends itself well to customization. Look for a motorcycle with a simple design and access to aftermarket parts. Some bikes come with easily modifiable wiring harnesses and removable components that make it simpler to adapt them for cafe racer aesthetics.

    5. Budget Considerations: Set a realistic budget that includes the initial purchase price and estimated costs for modifications like the seat, handlebars, and exhaust system. Be wary of seemingly cheap options that may require extensive repairs, driving up overall expenses.

    6. Community Support: A strong online and local community can be invaluable. Check forums and social media groups for support, ideas, and recommendations on the models you are considering. Access to community resources can help troubleshoot issues and inspire creative solutions throughout your project.

    In summary, choosing the right base motorcycle for your cafe racer project involves evaluating model popularity, engine size, overall condition, customization potential, budget, and community support. Taking these factors into account will help you build a bike that not only looks great but also fits your needs and budget.

    Cost-Effective Modifications for a Unique Style

    Creating a distinctive cafe racer on a budget requires creativity and resourcefulness. Here are some cost-effective modifications that can enhance both the aesthetics and performance of your motorcycle.

    1. Custom Seat: Upgrading your seat can significantly change the look of your bike. Consider a DIY upholstered seat using affordable materials like marine vinyl or repurposed leather. Shaping the foam to a more aggressive style can also improve comfort and posture without high costs.

    2. Handlebars: Swapping out standard handlebars for clip-ons or cafe-style bars can streamline your bike’s silhouette. Clip-ons are often available at reasonable prices and can offer a racing-inspired look while improving the rider’s control and comfort during rides.

    3. LED Lighting: Replacing traditional bulbs with LED lights not only updates your bike’s look but also enhances visibility and energy efficiency. Customizing your turn signals and headlight with inexpensive LED kits can provide a modern touch without breaking the bank.

    4. Exhaust Modifications: A simple exhaust modification can drastically alter the sound and appearance of your bike. Look for affordable slip-on mufflers or consider DIY modifications to your existing exhaust system. A better exhaust can boost performance and create a unique auditory signature.

    5. Paint and Vinyl Wraps: A fresh coat of paint or a vinyl wrap can redefine your motorcycle’s look. Painting can be done at home with spray cans, while vinyl wraps are relatively inexpensive and can showcase intricate designs, allowing you to personalize your ride.

    6. Custom Graphics: Adding custom graphics or decals can enhance your bike’s personality. Use high-quality vinyl cutouts to create unique designs that express your style without needing an expensive paint job. Online services often provide affordable options for customization.

    7. Mirrors and Indicators: Replacing bulky stock mirrors with smaller, more stylish options can enhance the cafe racer aesthetic. Additionally, sleek indicators can streamline your bike’s profile, offering improved visibility while maintaining a minimalist look.

    By implementing these modifications, you can build a cafe racer that stands out uniquely while adhering to a budget. Use your creativity and resourcefulness to transform your motorcycle into a personal statement on two wheels.

    Finding Affordable Parts and Accessories Online

    Finding Affordable Parts and Accessories Online

    Building your dream cafe racer on a budget requires careful sourcing of parts and accessories. The digital landscape offers a vast array of options for budget-conscious builders. Websites specifically designed for motorcycle parts, such as RevZilla, Motorcycle Superstore, and Parts Unlimited, provide extensive inventories at competitive prices. Regularly checking these platforms can yield great deals.

    Moreover, don’t overlook the power of online marketplaces like eBay, Craigslist, and Facebook Marketplace. These platforms often feature used parts that are in excellent condition at a fraction of the cost of new ones. When purchasing used items, be sure to check seller ratings and reviews to ensure you are dealing with reputable sellers.

    Another avenue to explore is specialized forums and community groups dedicated to cafe racers and motorcycle modifications. Members often sell spare parts and accessories at reasonable prices, and you might even find custom components that suit your unique vision. Additionally, engaging with these communities can provide valuable insights and recommendations on where to find the best deals.

    Utilizing social media platforms like Instagram and Reddit can also lead you to dedicated shops and pages that specialize in discount motorcycle parts. Many sellers promote their offerings through these channels, often with limited-time discounts or promotions.

    Lastly, consider subscribing to newsletters from popular motorcycle parts retailers. These subscriptions can keep you informed about upcoming sales, seasonal discounts, and exclusive offers that could help you keep your budget in check.

  • Adventure GPS Units vs Smartphone Mounts

    Adventure GPS Units vs Smartphone Mounts

    Adventure GPS Units vs Smartphone Mounts

    In the realm of outdoor exploration, having the right navigation tools can make all the difference between a successful adventure and a disorienting experience. As technology evolves, outdoor enthusiasts are faced with the choice between traditional adventure GPS units and the increasingly popular smartphone mounts. Both options offer unique advantages and disadvantages, making it essential to understand their features and functionalities to determine the best fit for individual needs.

    Adventure GPS units, purpose-built for rugged environments, often come with advanced features such as topographic mapping, long battery life, and resistance to water and extreme temperatures. These dedicated devices provide reliable performance in remote areas where cell service may be absent, making them a trusted companion for serious explorers. On the other hand, smartphone mounts present a more versatile solution by leveraging the multifunctional capabilities of smartphones and modern apps tailored for outdoor navigation.

    Understanding the specific requirements of your adventures can guide your choice. Factors like battery sustainability, ease of use, and the availability of offline maps play a critical role in decision-making. Whether you are trekking through dense forests, scaling mountains, or navigating unfamiliar terrains, selecting between adventure GPS units and smartphone mounts is a fundamental step in ensuring a safe and enjoyable exploration experience.

    Comparing Navigation Accuracy Between GPS Devices and Smartphone Mounts

    Navigation accuracy is a critical factor for adventurers and explorers relying on technology for route planning and location tracking. Both dedicated GPS devices and smartphone mounts offer unique advantages in this domain, yet their performance can differ based on various circumstances.

    Dedicated GPS devices generally provide superior accuracy compared to smartphone mounts. These devices use specialized chipsets and antennas designed for acquiring satellite signals effectively, often supported by advanced algorithms that enhance positioning precision. They typically perform better in environments with obstructed views, such as dense forests or mountainous terrain, where smartphones may struggle to maintain a strong signal.

    Smartphone mounts, while convenient and multifunctional, can exhibit variability in accuracy. The GPS chips found in smartphones are generally less powerful than those in dedicated devices. Additionally, smartphones rely heavily on a combination of satellite signals, Wi-Fi positioning, and cell tower triangulation. In urban environments with tall buildings or other signal obstructions, the smartphone’s accuracy can diminish, leading to potential navigation errors.

    Battery life is another crucial consideration affecting performance during navigation. Dedicated GPS units are designed for long-lasting use, often extending for many hours or even days on a single charge. In contrast, using a smartphone for navigation can quickly drain its battery, especially if other applications are running concurrently. This factor can lead to premature device failure during extended explorations, impacting overall navigation reliability.

    Weather conditions also play a role in navigation accuracy. Dedicated GPS devices tend to perform consistently in challenging weather situations, such as heavy rain or snow. Conversely, smartphones may face issues due to moisture interference and reduced signal strength in adverse conditions, potentially leading to inaccurate location tracking.

    In summary, while both GPS devices and smartphone mounts serve the purpose of navigation effectively, dedicated GPS units generally offer higher accuracy and reliability in diverse environments. Adventurers should consider their specific needs and the contexts in which they will be exploring before choosing between these two options.

    How to Choose the Right Mount for Your Smartphone During Outdoor Activities

    How to Choose the Right Mount for Your Smartphone During Outdoor Activities

    Choosing the right mount for your smartphone is crucial for ensuring safe and effective navigation during outdoor activities. The first step is to consider the type of activity you will be engaging in, such as hiking, biking, or kayaking, as this will influence the mounting style needed.

    Next, assess the compatibility of the mount with your smartphone model. Various mounts are designed for specific devices, taking into account size, shape, and camera placement. Ensuring a secure fit is essential to prevent your phone from falling during intense movements.

    Look for mounts that offer durability and weather resistance, especially if you frequently encounter harsh outdoor conditions. Materials such as high-quality plastics or aluminum alloys are preferable for longevity and strength. Waterproof or water-resistant features can also protect your device from unexpected rain or splashes.

    Consider the mounting mechanism as well. Options include adhesive pads, clamps, or straps. Adhesive pads provide a strong, permanent bond but may limit repositioning, while clamps or straps offer flexibility for adjustments. Choose a method that aligns with how often you switch between locations or activities.

    Stability is another critical factor; ensure the mount can securely hold your smartphone even during bumpy rides or rugged terrain. A stabilizing feature such as shock absorption can be beneficial when biking or off-roading.

    Lastly, evaluate additional features, such as the degree of adjustability and ease of access. A mount that allows for various viewing angles and easy handling will enhance your navigation experience. Some mounts even enable wireless charging, which can be a great convenience during extended trips.

    Durability and Weather Resistance: Which is Better for Harsh Environments?

    Durability and Weather Resistance: Which is Better for Harsh Environments?

    When exploring rugged terrains or unpredictable weather conditions, the choice between an adventure GPS unit and a smartphone mount becomes critical. Adventure GPS units are specifically designed for outdoor use, often boasting military-grade durability and water resistance rated at IP67 or higher. These devices can withstand significant impact, exposure to dust, and immersion in water, making them reliable companions in severe environments.

    On the other hand, smartphones, while increasingly equipped with advanced features, generally prioritize sleek design over durability. Most mainstream smartphones have some level of water resistance, commonly rated at IP68, but they are not immune to damage from drops or extreme temperatures. Even with protective cases, smartphones are still vulnerable when faced with the rigors of adventure activities, such as hiking, mountain biking, or camping.

    Battery performance is another consideration. Adventure GPS units typically utilize long-lasting batteries optimized for continuous use in remote locations, whereas smartphones often struggle to maintain battery life under demanding conditions, particularly with high usage of GPS and location services.

    Furthermore, the screens of dedicated adventure GPS devices are designed for visibility in bright sunlight and can resist scratches better than most smartphone displays. This is crucial for navigating effectively in outdoor settings where sunlight can interfere with readability.

    In summary, for harsh environments where durability and weather resistance are paramount, adventure GPS units outperform smartphones. Their robust construction, superior water and dust protection, and extended battery life make them the preferred choice for serious explorers seeking reliability in extreme conditions.

  • Best Full-Face Helmets for Speed and Safety

    Best Full-Face Helmets for Speed and Safety

    Best Full-Face Helmets for Speed and Safety

    When it comes to high-speed racing, the importance of safety cannot be overstated. A quality helmet is not just an accessory; it is a crucial piece of equipment that can mean the difference between a safe ride and a serious injury. Full-face helmets provide comprehensive protection, enveloping the entire head while ensuring optimal aerodynamics and comfort. With advancements in technology and design, today’s helmets offer enhanced safety features without compromising performance.

    In this article, we will explore the top full-face helmets that expertly balance speed and safety. Each model featured has undergone rigorous testing to meet the highest safety standards, ensuring that they not only protect the wearer but also provide superior visibility and comfort during high-speed maneuvers. From innovative materials to cutting-edge ventilation systems, these helmets represent the best in modern helmet design.

    Choosing the right helmet involves understanding the unique needs of your riding style, whether you’re a seasoned racer or an enthusiastic weekend rider. This guide will equip you with the knowledge to make an informed decision. Prioritize your safety without sacrificing performance; discover the helmets that excel in both categories, offering unmatched protection while enhancing your riding experience.

    Evaluating Impact Resistance and Material Durability

    When choosing a full-face helmet, two critical factors stand out: impact resistance and material durability. The effectiveness of a helmet in protecting the rider during an accident largely depends on how well it can withstand impacts and how long it will last under various conditions.

    Impact resistance is typically assessed using standardized tests, such as the DOT (Department of Transportation) or ECE (Economic Commission for Europe) certifications. These tests evaluate how well a helmet can absorb energy during a collision. Helmets made from high-quality materials like polycarbonate, fiberglass, or carbon fiber usually exhibit superior impact resistance. Polycarbonate helmets, while often more affordable, provide excellent energy absorption and are lightweight. In contrast, fiberglass and carbon fiber offer enhanced structural integrity and are preferred for high-performance riding.

    Material durability is equally essential. Helmets must endure not only impacts but also the rigors of everyday use. High-quality helmets are constructed with advanced materials that resist wear, UV radiation, and environmental extremes. Moreover, features such as anti-scratch visors and removable, washable liners contribute to maintaining the helmet’s condition over time. A durable helmet will retain its protective qualities and appearance longer, offering riders consistent safety over the years.

    In conclusion, evaluating impact resistance alongside material durability is crucial when selecting a full-face helmet. Understanding these aspects helps riders make informed choices to ensure maximum protection and longevity, thereby enhancing their riding experience.

    Assessing Aerodynamics for High-Speed Riding

    Assessing Aerodynamics for High-Speed Riding

    Aerodynamics plays a crucial role in the performance and safety of full-face helmets designed for high-speed riding. As riders often reach significant velocities, the aerodynamic efficiency of a helmet can determine not only comfort but also stability and control. The design elements that contribute to a helmet’s aerodynamic profile include its shape, the smoothness of its surface, and features like vents and spoilers.

    The shape of a helmet is primarily responsible for how air flows around it. A streamlined silhouette minimizes drag, allowing the rider to move more efficiently through the air. Manufacturers often use computational fluid dynamics (CFD) simulations to refine the helmet’s contour, ensuring optimal airflow and reduced turbulence. A well-designed helmet should channel airflow effectively, helping to maintain stability at high speeds.

    Surface texture is another essential factor. A smoother surface reduces friction, which can otherwise disrupt airflow and increase drag. Some helmets feature specialized coatings or finishes that enhance their aerodynamic properties. Riders should be aware that even a small increase in drag can negatively impact performance, especially at racing speeds.

    Vents and exhaust ports are often included in helmet designs to manage airflow efficiently. While these features enhance ventilation and rider comfort, they also need to be strategically placed to prevent compromising aerodynamics. Ineffectively positioned vents can cause unwanted turbulence, leading to instability. Therefore, manufacturers focus on innovation to balance ventilation needs with aerodynamic performance.

    Another vital aspect is the helmet’s weight distribution. Helmets that are heavier at the front can create a forward tilt during high-speed riding, affecting aerodynamics. Light-weight materials that distribute weight evenly around the head ensure a more stable and comfortable riding position, further enhancing the aerodynamic performance.

    Riders should also consider wind tunnel testing results provided by manufacturers. These tests simulate real-world conditions and help quantify the aerodynamics of helmets under various speeds. By comparing performance metrics, riders can make informed decisions based on how a helmet will perform in a high-speed environment.

    Ultimately, assessing aerodynamics is essential for high-speed riding helmets. Riders who prioritize a helmet’s aerodynamic features can significantly enhance their riding experience, ensuring safety, comfort, and improved performance in demanding conditions.

    Understanding Fit and Comfort for Long Rides

    Understanding Fit and Comfort for Long Rides

    When choosing a full-face helmet for extended riding sessions, proper fit and comfort are essential factors that directly affect the overall experience. A well-fitting helmet not only enhances safety but also reduces fatigue, allowing riders to focus on their journey rather than physical discomfort.

    Begin with the sizing of the helmet. Each manufacturer has its own sizing chart, so it is crucial to measure the circumference of your head accurately. Typically, this is done just above the eyebrows and around the largest part of the back of the head. Ensure the helmet fits snugly without causing pressure points. A helmet that is too loose may move around, while one that is too tight can lead to headaches during long rides.

    The interior padding also plays a significant role in comfort. Look for helmets with moisture-wicking and breathable materials that help manage sweat over long distances. Additionally, removable and washable liners are a plus, as they promote hygiene and comfort throughout various weather conditions.

    Ventilation is another critical aspect to consider. A helmet that offers adjustable vents can provide optimal airflow, keeping your head cool during hot rides and minimizing fogging of the visor. Test the ventilation systems while trying on the helmet to gauge how well it performs in different scenarios.

    Lastly, keep in mind that different riding positions may require different helmet shapes. For example, a sportbike helmet may fit differently than one designed for touring. That’s why trying on multiple models and brands will help in finding the ideal match for your riding style and long-distance comfort.