Blog

  • How to Tune a Motorcycle for Track Days

    How to Tune a Motorcycle for Track Days

    How to Tune a Motorcycle for Track Days

    Participating in track days offers an exhilarating opportunity for motorcycle enthusiasts to push their machines to the limit in a controlled environment. However, to truly unlock the potential of your bike, proper tuning is essential. This guide will delve into the critical aspects of motorcycle tuning tailored specifically for track performance, ensuring you achieve maximum speed, agility, and handling on race day.

    Understanding Your Bike’s Dynamics is the first step in effective tuning. Every motorcycle reacts differently to modifications due to its unique design and engineering. Familiarizing yourself with the specific characteristics of your bike’s engine, suspension, and chassis will provide a solid foundation for any adjustments. Consider factors such as weight distribution, power delivery, and tire selection to optimize your riding experience.

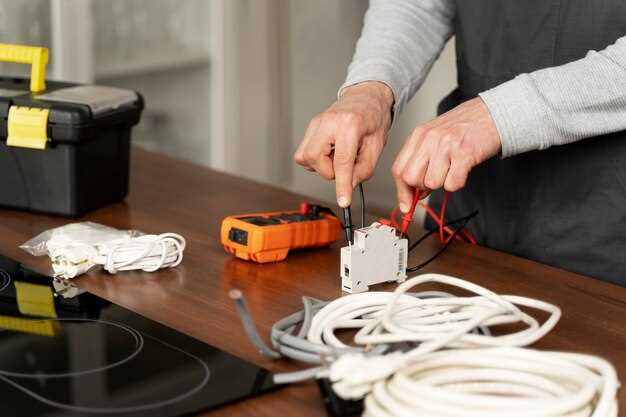
    Next, upgrading essential components can significantly enhance your bike’s performance on the track. Focus on the suspension system, braking components, and exhaust modifications. A high-quality suspension setup is vital for maintaining stability and grip in corners, while improved brakes ensure confidence during deceleration. Additionally, an upgraded exhaust system can boost power output, allowing for quicker acceleration and a more responsive throttle.

    Finally, fine-tuning your settings is crucial. This involves adjusting tire pressures, suspension settings, and engine mapping based on the track’s layout and conditions. Each track presents different challenges, so being adaptable with your setup can mean the difference between a competitive lap time and a missed opportunity. By investing time in understanding and tuning your motorcycle, you set yourself up for a memorable day on the track.

    Optimizing Suspension Settings for Enhanced Cornering

    Optimizing Suspension Settings for Enhanced Cornering

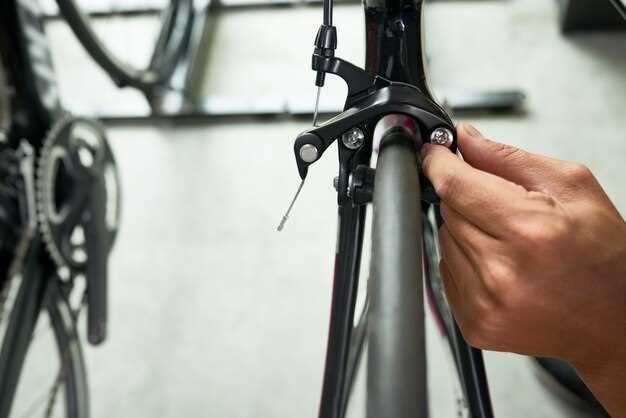
    Optimizing suspension settings is crucial for improving cornering performance on the track. A well-tuned suspension can provide better stability, grip, and control, allowing the rider to navigate corners more confidently and efficiently.

    Start with preload adjustments. Preload affects how much the suspension compresses under the bike’s weight. For track use, a firmer preload can reduce excessive sag, enhancing cornering response. Adjust the front and rear preload to achieve around 30% sag for optimum performance. This ensures that the suspension has enough travel left for absorbing bumps and maintaining traction.

    Next, consider compression and rebound damping settings. Compression damping controls how quickly the suspension compresses under load, while rebound damping manages the return speed after compression. A stiffer compression setting can help the suspension remain firm during cornering forces, while a slightly softer rebound can allow the suspension to react quicker to changes in terrain, improving grip. Adjust these settings incrementally and test their effect on cornering behavior, focusing on a balance between swift response and stability.

    Ride height adjustment also plays a significant role. By raising the rear end of the motorcycle, you can quicken the steering response and change the weight distribution, which is beneficial for faster cornering. However, raising the front can enhance front-end grip but make the bike feel less stable. Finding the right balance between front and rear ride height is key to maintain optimal performance during turns.

    Finally, consider the tire pressure in relation to suspension settings. Proper tire pressure ensures optimal tire contact with the track, enhancing grip. High pressures can lead to a harsher ride and decreased grip, while too low can result in poor cornering stability. Adjust tire pressure in conjunction with suspension settings for the best results.

    In conclusion, optimizing suspension settings involves adjusting preload, damping, height, and tire pressure to create a balanced setup that enhances cornering efficiency and rider confidence on track days. Regular testing and fine-tuning in real riding conditions will lead to the best outcomes, allowing you to unlock the full potential of your motorcycle.

    Tuning Engine Performance for Maximum Power Output

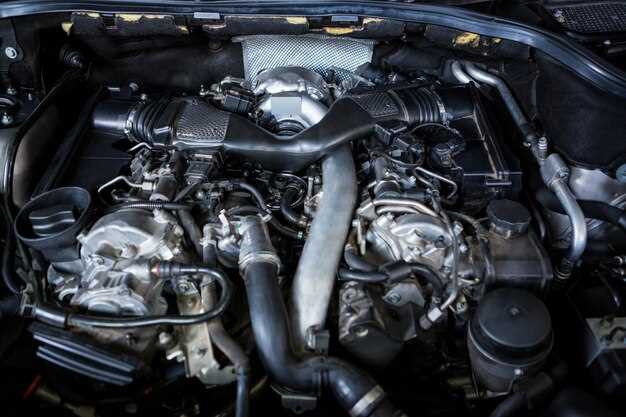
    Tuning your motorcycle’s engine for maximum power output involves several critical steps that enhance performance. Focusing on key components can lead to significant improvements in horsepower and torque, providing a noticeable advantage on track days.

    1. Air Intake System: The introduction of more air into the engine significantly boosts power. Upgrading to a high-performance air filter allows for increased airflow while maintaining filtration. Installing an aftermarket intake system can optimize the air-to-fuel mixture, ultimately enhancing engine response.

    2. Fuel System Optimization: The fuel system must keep pace with increased airflow. Upgrading fuel injectors or installing a high-flow fuel pump ensures your engine receives sufficient fuel. Additionally, tuning the ECU (Engine Control Unit) can help adjust fuel maps for optimal combustion, ensuring a powerful output without sacrificing efficiency.

    3. Exhaust System Upgrade: A free-flowing exhaust system reduces back pressure and allows for quicker exhaust gas expulsion. High-performance headers, mid-pipes, and silencers enhance exhaust flow. This improvement not only increases power but also produces a more aggressive engine sound.

    4. Engine Mapping: Fine-tuning the engine’s map is crucial for achieving maximum performance. Utilizing a power commander or similar tuning device enables customization of ignition timing and fuel delivery across different RPM ranges. This precision can unlock hidden power in your motorcycle.

    5. Compression Ratio Adjustment: Increasing the engine’s compression ratio can yield higher power outputs. However, this requires careful consideration of fuel quality. Higher compression engines may necessitate higher-octane fuel to prevent knocking.

    6. Performance Camshafts: The camshaft controls the timing of valve opening and closing. Upgrading to performance camshafts can improve airflow into and out of the combustion chamber. This modification enhances high-end power, making it ideal for track conditions where acceleration is paramount.

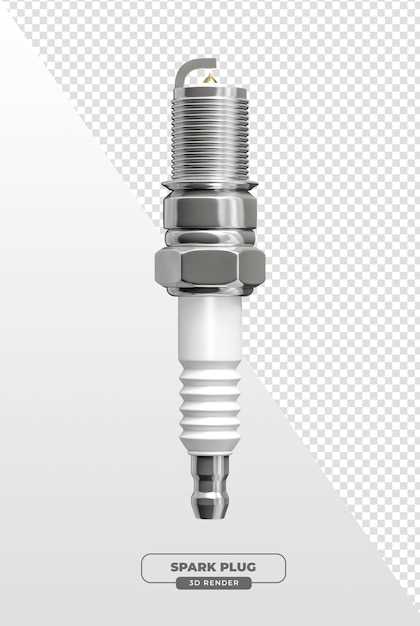
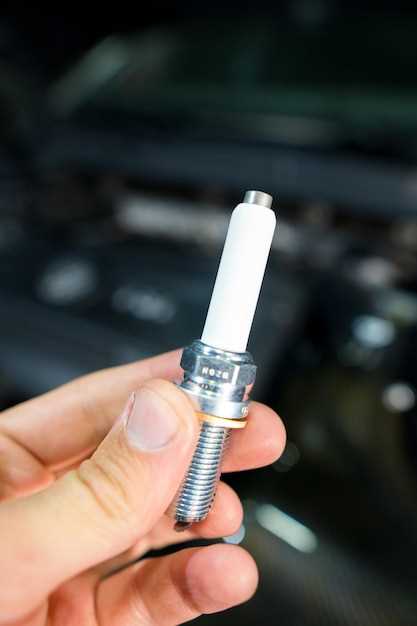
    7. Regular Maintenance: Maintaining your motorcycle is essential for optimal performance. Regularly checking and replacing spark plugs, ensuring proper oil levels, and keeping the engine clean can significantly impact engine performance. A well-maintained engine runs more efficiently and reliably, especially on track days.

    In conclusion, tuning your motorcycle’s engine for maximum power output requires an integrated approach, focusing on airflow, fuel delivery, and precise tuning. By systematically addressing each aspect, you can achieve remarkable performance gains, enhancing your track day experience.

    Choosing the Right Tires and Pressure for Track Conditions

    Choosing the Right Tires and Pressure for Track Conditions

    Selecting the appropriate tires for track days is crucial for maximizing grip, stability, and overall performance. Track conditions can vary widely based on weather, temperature, and track surface, so understanding how to choose and set up your tires is essential for a successful outing.

    Begin by determining the type of tires that are suitable for the track surface you will be riding on. Track-focused tires, such as slicks or treaded sport tires, offer superior grip and are designed to perform optimally under high temperatures and aggressive riding conditions. Slick tires, while providing the best performance, are not suitable for wet conditions. Therefore, if rain is forecasted, consider sport tires with adequate tread patterns for improved water dispersion and traction.

    Next, consider the temperature range of the track. Different tire compounds perform at their best within specific temperature ranges. Soft compounds offer excellent grip in warmer conditions but may wear out quickly, while harder compounds provide durability but may not achieve optimal grip unless adequately heated. Assess the expected track temperatures and choose a tire compound that aligns with these conditions to maximize performance and safety.

    Once you have selected the right tires, attention must shift to tire pressure. The correct tire pressure is vital for achieving the desired contact patch with the track, which influences handling and grip. Consult the manufacturer’s recommendations as a starting point, then adjust based on your weight, riding style, and track conditions. Generally, track pressure is lower than street pressure to increase the contact patch and enhance grip, but be cautious not to drop it too low, which could lead to tire overheating and potential blowouts.

    As a rule of thumb, start at the manufacturer’s recommended pressure and monitor tire performance through your first few sessions on the track. Look for signs of under-inflation, such as excessive sidewall flex or overheating, and adjust accordingly. During practice runs, pay attention to tire wear patterns, which can provide valuable insights into your tire setup and pressure. Fine-tuning your tire pressures as you progress through the day will help you achieve the best possible handling and stability.

    In summary, selecting the right tires and setting the appropriate pressure are essential steps in preparing your motorcycle for track conditions. Consider the type of tires, the temperature range, and continuously monitor and adjust tire pressures throughout the day to enhance your performance and enjoyment on the track.

  • How to Carry Gear on Your Bike Without a Backpack

    How to Carry Gear on Your Bike Without a Backpack

    How to Carry Gear on Your Bike Without a Backpack

    Cycling offers an exhilarating experience, whether you’re commuting to work, enjoying a weekend ride, or embarking on an adventure. However, carrying gear can become cumbersome, especially when relying on a backpack. Finding efficient ways to transport your belongings can greatly enhance your cycling experience while ensuring comfort and ease of movement.

    In this article, we will explore innovative solutions for carrying essential items on your bike without resorting to a traditional backpack. By utilizing various methods such as bike-mounted storage, frame bags, and cargo systems, you can travel light and efficiently. These smart alternatives not only free your back from discomfort but also optimize your bike’s performance.

    Understanding the needs of different types of cyclists, we’ll discuss practical options that cater to casual riders, commuters, and outdoor enthusiasts alike. With the right approaches, you can confidently ride with all your necessary gear while maintaining balance and agility on the road or trail. Dive in to discover how to make the most of your cycling adventures without the bulk of a backpack!

    Utilizing Frame Bags for Optimal Storage

    Frame bags are an excellent solution for cyclists looking to maximize storage capacity without resorting to a backpack. These bags, designed to fit within the triangular frame of the bike, offer a low center of gravity and distribute weight evenly, enhancing stability while riding.

    One of the primary advantages of frame bags is their versatility. They come in various sizes and configurations, allowing cyclists to choose a bag that fits their specific bike model and storage needs. This customization ensures that essentials such as tools, snacks, and a first aid kit are easily accessible yet securely stored.

    Frame bags are typically made from durable, weather-resistant materials, protecting your gear from the elements. This feature is particularly important for those who ride in varying weather conditions, as it keeps gear dry and safe from moisture damage.

    An added benefit is the ease of installation. Most frame bags attach via Velcro straps or zippers, allowing for quick setup and removal. This convenience is especially useful for touring cyclists, who may need to adjust their gear frequently based on their journey’s demands.

    For optimal storage, consider organizing the contents within the bag using smaller pouches or bags. This method aids in keeping items categorized, making it easier to locate specific tools or supplies during a ride without rummaging through a cluttered space.

    In summary, frame bags offer a practical and efficient storage solution for cyclists. By utilizing these bags, riders can enjoy a more streamlined experience, freeing themselves from the discomfort of wearing a backpack while still carrying all necessary gear securely and conveniently.

    Investing in Panniers for Balanced Weight Distribution

    Investing in Panniers for Balanced Weight Distribution

    Panniers are an essential accessory for cyclists seeking an efficient way to transport gear without compromising balance and comfort. By attaching bags to the sides of your bike, you can significantly improve weight distribution, which enhances stability during your ride.

    One of the key advantages of panniers is their ability to carry heavy loads without affecting the center of gravity. Unlike backpacks that concentrate weight on your back, panniers spread the load evenly across the bike’s rear or front, allowing for smoother handling, especially when navigating turns or uneven terrain.

    Proper placement is vital for optimal weight distribution. For most setups, placing heavier items in the lower sections of the panniers lowers the center of gravity, further stabilizing the bike. Additionally, balancing the weight between both sides will prevent any lateral tilt, making your ride safer and more comfortable.

    Investing in a good pair of panniers not only helps with weight management but can also provide waterproofing, organizational pockets, and quick-release mechanisms for ease of use. Look for features that suit your riding style, whether it be commuting, touring, or recreational cycling.

    In conclusion, selecting the right panniers allows cyclists to carry ample gear without resorting to a backpack. By ensuring balanced weight distribution, you enhance your riding experience and maintain control, making every journey enjoyable.

    Incorporating Cargo Racks and Baskets for Extra Cargo Space

    Incorporating Cargo Racks and Baskets for Extra Cargo Space

    Enhancing your bike’s carrying capacity can be efficiently achieved by integrating cargo racks and baskets. These accessories not only provide ample space for transporting goods but also maintain balance and stability during rides.

    Cargo Racks are generally mounted on the rear or front of the bike frame. They offer a flat platform, which is ideal for securing larger items such as bags or boxes. Most racks are built to accommodate a variety of weights, ensuring that cyclists can carry everything from groceries to camping gear. When selecting a cargo rack, consider its weight limit and compatibility with your bike type to ensure optimal performance.

    Installing a cargo rack may involve a few tools and minor modifications to your bike. Typically, they attach using brackets that fit into existing holes on the frame. Some racks even come with a quick-release feature for easy removal when not needed.

    In addition to racks, baskets provide a convenient way to transport smaller items. Mounted either at the front or rear, bike baskets are helpful for carrying everyday items like a purse, shopping bags, or even a pet. Baskets are often constructed from durable materials to withstand various weather conditions and regular use.

    When choosing a basket, verify its attachment method. Some models utilize hooks, while others may require bolts for a more secure fit. Front baskets generally allow for better visibility of items while riding, while rear baskets keep the load out of the way.

    Integration of both cargo racks and baskets creates a versatile storage solution. Consider adding straps or bungee cords for securing items, ensuring that nothing shifts or falls off during transit. This set-up not only enhances your bike’s capability but also encourages more cycling trips by reducing the hassle of carrying cargo.

  • Riding Techniques for Rocky and Muddy Trails

    Riding Techniques for Rocky and Muddy Trails

    Riding Techniques for Rocky and Muddy Trails

    For those who seek adventure on two wheels, navigating rocky and muddy trails presents both challenges and opportunities for skill development. The unique terrain requires not only physical endurance but also a refined understanding of riding techniques that can make the difference between a successful journey and a frustrating experience.

    Riding on rugged paths demands precise control and effective navigation strategies. Riders must learn to adjust their body position, maintain balance, and select the right lines in order to maneuver smoothly over obstacles. Mastering these techniques is essential for tackling unpredictable landscapes and maintaining momentum.

    Furthermore, managing different weather conditions plays a crucial role. Muddy trails can be particularly tricky, as traction varies greatly with moisture levels. Understanding how to read the terrain, adjust tire pressure, and apply appropriate braking techniques can significantly enhance a rider’s performance. Through practice and experience, mastering these skills will lead to more enjoyable and safer rides on challenging trails.

    Optimizing Body Position for Stability on Rough Terrain

    Maintaining an optimal body position is crucial for stability when navigating rocky and muddy trails. A well-executed posture enhances control and reduces the risk of losing balance. Here are essential guidelines to achieve the ideal body position:

    • Low Center of Gravity: Keep your body crouched to lower your center of gravity. This helps in maintaining balance and allows for quicker reactions to obstacles.
    • Feet Placement: Position your feet shoulder-width apart on the pedals. This stance maximizes stability and helps with weight distribution.
    • Knees and Elbows: Slightly bend your knees and elbows. This flexion acts as shock absorbers when hitting bumps or uneven surfaces.
    • Body Lean: Lean your body slightly forward when descending, and shift backward uphill. This adjustment helps in maintaining traction and balance on varying gradients.

    Correctly positioning your body is just as important as bike handling skills. Focus on the following elements:

    1. Head Position: Keep your head up and eyes looking ahead. Anticipating obstacles allows for timely adjustments in your body position.
    2. Core Engagement: Engage your core muscles to provide additional stability. A strong core acts as a foundation for your body during rough rides.
    3. Weight Distribution: Shift your weight accordingly to maintain traction. When approaching obstacles, lean back to avoid forward pitching, and lean into turns to aid traction.
    4. Forearm Position: Keep your forearms parallel to the ground to absorb shocks effectively. This position prepares you for rapid changes in terrain.

    Practice these points in a controlled environment before tackling more challenging paths. Consistent application of these techniques will drastically improve your stability and confidence on rugged trails.

    Selecting the Right Tires for Mud and Rocks

    Selecting the Right Tires for Mud and Rocks

    Choosing the appropriate tires for riding on muddy and rocky trails is crucial for maximizing traction and ensuring safety. The right tires can significantly enhance your riding experience by providing better grip and stability.

    Tread Design: Look for tires with an aggressive tread pattern. Deep lugs and spaced-out tread elements are essential for mud as they help to channel away water and prevent the tire from becoming bogged down. A combination of wide and narrow lugs can offer versatility, allowing you to navigate both slippery mud and rugged rock surfaces effectively.

    Rubber Compound: The compound of the tire also matters. Softer rubber compounds typically offer better grip on rocky terrain and in muddy conditions. However, softer tires may wear out faster on hard-packed surfaces. Select tires that strike a balance to fit the conditions you’ll encounter most.

    Width and Volume: Tire width affects flotation and grip in mud. Wider tires provide a larger surface area, which helps to prevent sinking into soft ground. However, extremely wide tires may struggle on rocky surfaces. Opt for mid-width tires that can perform well across varied terrains without sacrificing performance.

    Pressure Settings: Adjusting tire pressure can influence traction. Lower pressures allow tires to conform to uneven surfaces, enhancing grip on rocks while improving flotation in mud. Be cautious with lower pressure in rocky terrain to avoid pinch flats; finding the right balance is essential.

    Seasonal Considerations: If you’re riding in specific seasonal conditions, consider terrain-specific tires. Some tires are designed for wet conditions with enhanced siping, while others may excel in dry, rocky environments. Research and select tires based on the most common conditions you expect to face.

    By carefully evaluating tread design, rubber compound, width, pressure settings, and seasonal requirements, you can select the optimal tires for your riding adventures in muddy and rocky trails. This thoughtful choice will not only improve performance but also enhance your overall riding confidence.

    Braking Techniques to Prevent Skidding and Maintain Control

    Braking Techniques to Prevent Skidding and Maintain Control

    Braking effectively on rocky and muddy trails is crucial for rider safety and performance. To maintain control and prevent skidding, a few key techniques should be mastered.

    1. Use Both Brakes: Instead of relying solely on the front or rear brake, utilize both simultaneously. The front brake provides significant stopping power, while the rear brake aids in stability. Balance your weight forward when using the front brake to avoid flipping over the handlebars.

    2. Modulate Brake Pressure: Apply brakes gradually and in a controlled manner. Sudden, hard braking can lead to loss of traction. Instead, use feathering techniques, where you lightly modulate brake pressure to maintain grip and control over uneven terrain.

    3. Keep Your Weight Centered: Positioning your weight correctly is essential for maintaining traction. When descending or braking, shift your body slightly back but keep your center of gravity low. This helps prevent the rear wheel from lifting or sliding out, offering better control.

    4. Look Ahead: Always anticipate obstacles and changes in terrain. By keeping your eyes focused a few meters ahead, you can adjust your braking accordingly. This proactive approach allows you to preemptively react rather than over-brake or skid.

    5. Practice on Various Surfaces: Familiarize yourself with different trail conditions by practicing your braking techniques on various surfaces. This helps you to learn how your bike responds to braking on rocky, muddy, or wet trails, building your confidence and improving your skills.

    6. Engage in Controlled Stops: Practice stopping in controlled situations. Gradually decrease speed while honing your ability to stop without skidding. This skill is vital when navigating in unpredictable terrains where grip varies significantly.

    By mastering these braking techniques, riders can significantly enhance their control on rocky and muddy trails, reducing the risk of skidding and ensuring a safer, more enjoyable riding experience.

  • Electrical Troubleshooting – A Step-by-Step Guide

    Electrical Troubleshooting – A Step-by-Step Guide

    Electrical Troubleshooting – A Step-by-Step Guide

    Electrical issues can be both frustrating and daunting, particularly for those who lack experience in handling such problems. However, understanding how to systematically approach electrical troubleshooting is crucial for both safety and efficiency. This guide aims to provide a clear and structured process for diagnosing and resolving common electrical issues in a step-by-step manner.

    In this guide, we will explore essential techniques and tools that can help identify the root cause of electrical problems. Whether you are dealing with flickering lights, circuit breaker trips, or non-functional outlets, the methodology outlined here will empower you to tackle these issues confidently. Safety is paramount, and we will emphasize precautions every step of the way.

    Follow along as we delve into the intricacies of electrical systems, breaking down each troubleshooting phase into manageable sections. With this guide, you will not only learn how to effectively resolve problems but also gain a deeper understanding of your electrical system, making you better prepared for future challenges. Whether you are a DIY enthusiast or a homeowner looking to gain some valuable knowledge, this guide is designed to assist you in your electrical troubleshooting journey.

    Identifying Common Electrical Issues in Household Appliances

    Understanding common electrical issues in household appliances is crucial for effective troubleshooting. Many problems can arise from simple causes that are easy to identify and fix. This section outlines several prevalent issues and how to recognize them.

    1. No Power

    The most common indication of a malfunctioning appliance is when it does not power on. Check the following:

    • Ensure the appliance is plugged in securely.
    • Inspect the outlet by testing it with another device.
    • Look for tripped circuit breakers or blown fuses in the electrical panel.

    2. Overheating

    Overheating can lead to appliance malfunctions or even fires. Symptoms include:

    • Unusual odors or burnt plastic smell.
    • Excessive heat on the exterior casing.
    • Appliance shutting off automatically due to thermal protection.

    3. Unusual Noises

    Appliances should operate quietly. If you hear strange sounds, consider these points:

    • Humming or buzzing could indicate motor issues.
    • Grinding noises might suggest worn bearings or components.
    • Clunking or rattling could mean loose parts or debris inside.

    4. Leakage

    Electric appliances should not leak fluid. If you notice any moisture, investigate the following:

    • Check seals and connections for damage.
    • Examine hoses and pipes connected to the appliance.
    • Identify any pooling liquid underneath the machine.

    5. Inconsistent Performance

    When appliances fail to operate as expected, it may point to underlying issues:

    • Check if the settings are properly adjusted.
    • Look for clogs or obstructions that may affect functionality.
    • Ensure that components like filters or belts are clean and intact.

    6. Error Codes

    Many modern appliances showcase error codes. Refer to the manufacturer’s manual for explanations. Common actions include:

    • Resetting the appliance to clear minor faults.
    • Consulting the troubleshooting section in the user manual for specific guidance.

    By recognizing these common issues, homeowners can efficiently address electrical problems and ensure the proper functioning of their household appliances. Regular maintenance and inspections also play a pivotal role in preventing these issues from arising.

    Using a Multimeter for Accurate Measurements during Troubleshooting

    Using a Multimeter for Accurate Measurements during Troubleshooting

    A multimeter is an essential tool in electrical troubleshooting, providing accurate measurements of voltage, current, and resistance. Understanding how to use a multimeter effectively can significantly enhance your diagnostic capabilities. Here are the key steps to utilize a multimeter during troubleshooting.

    1. Select the Correct Measurement Mode: Before taking any readings, ensure the multimeter is set to the appropriate mode. For voltage measurements, select the DC or AC voltage setting depending on the circuit type. For current measurements, choose the correct amp range. Resistance measurements require the multimeter to be in resistance mode.

    2. Safety First: Always observe safety precautions when working with electrical devices. Ensure the multimeter probes are in good condition and that you’re wearing appropriate personal protective equipment. If measuring high voltages, use insulated probes and maintain a safe distance from exposed conductors.

    3. Measuring Voltage: To measure voltage, touch the black probe to the ground or common point and the red probe to the point where voltage is to be measured. Read the display to determine the voltage. Ensure to interpret the result accurately, considering both the value and polarity if applicable.

    4. Measuring Current: To measure current, you need to break the circuit and connect the multimeter in series. Disconnect one side of the load, connect the black probe to the circuit side, and the red probe to the load side. This setup allows current to flow through the multimeter, providing an accurate current reading.

    5. Measuring Resistance: When measuring resistance, the circuit must be powered off. Connect the probes across the component or section of the circuit you wish to measure. The display will show the resistance value. A common mistake is not ensuring the component is disconnected, which may give inaccurate readings.

    6. Interpreting Readings: Take time to analyze the readings. A steady reading often indicates a properly functioning component, while fluctuating or zero values might point towards faults. Use reference values from manufacturer specifications for comparison.

    7. Recording Measurements: As you perform measurements, document the results. Keeping a troubleshooting log helps track changes and understand patterns, aiding in identifying persistent issues.

    8. Troubleshooting Strategy: Use measurements to develop a structured troubleshooting strategy. Start with the most accessible points in the circuit to identify issues systematically. An effective approach combines multimeter readings with logical reasoning to isolate faults.

    In conclusion, mastering the use of a multimeter allows for effective troubleshooting of electrical systems. By following these steps and understanding how to interpret the measurements accurately, you can diagnose and solve electrical issues more efficiently.

    Safety Practices for Conducting Electrical Repairs at Home

    Safety Practices for Conducting Electrical Repairs at Home

    When undertaking electrical repairs at home, prioritizing safety is paramount. Begin by ensuring that you are equipped with the necessary tools and knowledge to perform the task at hand. Here are essential safety practices to follow:

    1. Turn Off the Power: Before starting any repair, locate the circuit breaker and turn off the power to the area you will be working on. Use a voltage tester to confirm that the power is completely off. Never assume the circuit is de-energized.

    2. Use Personal Protective Equipment (PPE): Equip yourself with appropriate PPE such as insulated gloves, safety goggles, and non-conductive shoes. This gear will provide an additional layer of protection against electrical shock and injuries.

    3. Work in a Dry Environment: Ensure that your workspace is dry and free from moisture. Water is a conductor of electricity, and working in damp conditions significantly increases the risk of electrical shock.

    4. Avoid Overcrowded Workspaces: Keep your workspace organized and free of clutter. Having too many tools and materials in one area can lead to accidents. Ensure that you have enough space to work safely.

    5. Follow Manufacturer Instructions: Read and adhere to the manufacturer’s guidelines for any electrical devices or components you are working with. This includes installation instructions, maintenance tips, and safety requirements.

    6. Inspect Tools and Equipment: Regularly check your tools and equipment for signs of damage or wear. Faulty tools can be hazardous and may lead to accidents. Replace any damaged equipment immediately.

    7. Use Ground-Fault Circuit Interrupters (GFCI): In areas where water is present, such as kitchens and bathrooms, make use of GFCI outlets. These devices automatically cut off power if they detect an imbalance, reducing the risk of shock.

    8. Be Aware of Your Surroundings: Ensure that you are aware of your surroundings while conducting repairs. Identify potential hazards such as ladders, open doors, or other individuals present who might inadvertently interfere with your work.

    9. Know Your Limits: If you encounter a repair that seems beyond your skill level, do not hesitate to call a professional electrician. Attempting complex repairs without proper training can lead to dangerous situations.

    10. Keep a First Aid Kit Handy: Always have a well-stocked first aid kit accessible in case of an accident. Familiarize yourself with basic first aid procedures for electrical injuries, including how to administer CPR if necessary.

    By adhering to these safety practices, you can significantly reduce the risk of accidents and ensure that electrical repairs are performed safely and effectively.

  • How to Replace Brake Pads on Any Sport Bike

    How to Replace Brake Pads on Any Sport Bike

    How to Replace Brake Pads on Any Sport Bike

    Replacing brake pads on your sport bike is an essential maintenance task that ensures your safety and enhances the performance of your ride. Over time, brake pads wear down due to friction and exposure to various environmental factors. If you notice reduced braking efficiency or hear unusual noises when engaging the brakes, it’s crucial to address the issue promptly.

    This guide will walk you through the steps necessary to replace the brake pads effectively. Whether you are a seasoned rider or a novice enthusiast, having a clear understanding of the procedure will empower you to perform this task confidently. We will cover the tools required, safety precautions to take, and detailed instructions for the process.

    By taking the time to learn how to replace your sport bike’s brake pads, you can save on costly mechanic fees and gain intimate knowledge of your machine. A well-maintained braking system not only contributes to optimal performance but also plays a vital role in your overall riding experience. Let’s dive into the process and ensure your bike stops as effectively as it should.

    Choosing the Right Brake Pads for Your Model

    Choosing the Right Brake Pads for Your Model

    Selecting the appropriate brake pads for your sport bike is crucial for ensuring optimal performance, safety, and longevity. Not all brake pads are created equal; they are designed with specific materials and characteristics that cater to various riding styles, environments, and bike models.

    Understand Your Riding Style: The first step in choosing brake pads is to evaluate your riding habits. If you frequently ride at high speeds or on racetracks, consider high-performance pads that offer better heat resistance and shorter stopping distances. Conversely, if you primarily ride in urban settings, standard pads that prioritize longevity and smooth braking might be more suitable.

    Know Your Bike’s Specifications: Each sport bike has unique requirements based on its weight, engine power, and braking system. Consult your owner’s manual or contact the manufacturer to determine the compatible brake pad types for your model. This information will help narrow down your choices significantly.

    Material Matters: Brake pads are typically made from three main materials: organic, semi-metallic, and ceramic. Organic pads offer a softer, quieter ride, but may wear out faster. Semi-metallic pads provide excellent performance and heat dissipation, making them a popular choice for sport riders. Ceramic pads are known for their durability and noise reduction, providing a balance between performance and comfort. Evaluate the pros and cons of each material to select what best fits your needs.

    Consider Environmental Conditions: If you ride in wet or cold conditions, you’ll need brake pads that perform well under these circumstances. Look for pads specifically designed to offer better wet weather performance and enhanced grip. Options that include slotted or drilled designs can also help with water evacuation and improve performance in adverse conditions.

    Check for Reviews and Recommendations: Researching user experiences can provide valuable insight into which brake pads work best for your specific model. Look for product reviews, ratings, and feedback from other sport bike owners. Their firsthand experiences can help inform your decision and expose any potential issues.

    Budget Considerations: While it may be tempting to go for the cheapest option, investing in quality brake pads can save money in the long run. Lower-priced pads may not provide the necessary performance and could wear out faster, leading to more frequent replacements. Balance your budget with the importance of safety and performance.

    By understanding your riding style, your bike’s specifications, materials available, and user experiences, you can confidently select the right brake pads for your sport bike. Remember, effective braking contributes not only to performance but also to your overall safety on the road.

    Step-by-Step Procedure for Removing Old Brake Pads

    Step-by-Step Procedure for Removing Old Brake Pads

    Ensure the motorcycle is on a stable surface and securely supported using a bike stand. This will prevent any movement while you work on the brakes.

    Start by loosening the front or rear wheel axle nut, depending on which brake pads you’re replacing. Use the appropriate size socket or wrench to avoid damaging the nut.

    Next, remove the wheel by unscrewing the axle nut completely and carefully sliding the wheel out of the forks or swingarm. Set it aside in a safe location.

    Locate the brake caliper, which is usually situated near the rotor. Inspect the caliper for bolts or pins securing it in place. Using the correct tool, typically a socket or Allen wrench, remove these fasteners carefully.

    Once the caliper is free, gently slide it off the rotor. Be cautious not to let the caliper hang by the brake line, as this can cause damage. Use a bungee cord or similar to suspend it if needed.

    With the caliper removed, locate the brake pads within it. Most calipers will have an easily accessible clip or retaining pin holding the pads in place. Remove this clip or pin using pliers or a screwdriver.

    Carefully slide out the old brake pads from the caliper. Take note of their orientation and how they fit within the caliper to ensure correct installation of the new pads later.

    Inspect the caliper for any debris or buildup that may have accumulated over time. Clean the caliper with brake cleaner if needed, readying it for the new pads.

    Finally, check the brake piston within the caliper. If it has extended due to worn pads, carefully compress it back into the caliper using a suitable tool or a c-clamp, creating space for the new pads. You’re now ready for the installation of new brake pads.

    Proper Installation Techniques for New Brake Pads

    When installing new brake pads on your sport bike, it is crucial to follow specific techniques to ensure optimal performance and longevity. Begin by ensuring that the bike is on a stable stand, preventing any movement during the process. This provides a secure environment for working on the brakes.

    Before removing the old brake pads, inspect the entire brake system, including rotors and calipers, for any signs of damage or wear. Clean the caliper and surrounding area using brake cleaner to remove dust and grease. This step is essential to avoid contamination of the new pads.

    Remove the wheel to access the brake caliper. Following the manufacturer’s instructions, detach the caliper from its mounting position. Gently slide out the old brake pads, taking care not to damage any brake hardware.

    Prepare the new brake pads for installation. Apply a thin layer of brake grease to the back of each pad where it contacts the caliper to reduce vibration and noise. Avoid applying grease to the pad’s friction surface, as this can compromise braking performance.

    Position the new pads into the caliper, ensuring they align correctly with the caliper bracket. Push them into place firmly, and make sure they are seated correctly. Reattach the caliper, ensuring all bolts are tightened to the manufacturer’s torque specifications to guarantee a secure fit.

    After the caliper is secured, reinstall the wheel and tighten it to the recommended specifications. Before taking the bike for a ride, pump the brake lever a few times to ensure that the pads make contact with the rotor, restoring proper brake function.

    Finally, conduct a test at low speeds to assess the brakes’ responsiveness. If everything feels solid, the installation process is complete, and your sport bike is ready for the road.

  • What Riding a Motorcycle Taught Me About Focus

    What Riding a Motorcycle Taught Me About Focus

    What Riding a Motorcycle Taught Me About Focus

    In an increasingly distracted world, the ability to maintain focus is a skill that many find challenging to cultivate. One unconventional yet effective method to enhance this skill is through motorcycle riding lessons. Riding a motorcycle requires a unique combination of concentration, coordination, and multi-tasking, which can significantly sharpen one’s mental acuity.

    Engaging in motorcycle lessons demands your undivided attention. Each ride compels the rider to be acutely aware of their surroundings, from the road conditions to the behavior of other drivers. This heightened awareness fosters a deeper sense of focus, as the rider learns to anticipate potential hazards and respond accordingly. In this sense, motorcycle riding becomes not just a physical activity but a mental workout that sharpens cognitive abilities.

    Moreover, the structured nature of motorcycle training provides learners with practical techniques to enhance their focus further. Instructors emphasize the importance of body positioning, throttle control, and braking techniques, all of which require mental engagement. As riders practice these skills, they develop the ability to concentrate on multiple variables simultaneously, thereby reinforcing their focus in diverse situations, both on and off the bike.

    Developing Concentration Skills through Practical Riding Exercises

    Developing Concentration Skills through Practical Riding Exercises

    Motorcycle riding demands a high level of focus and concentration. To enhance these skills, riders can engage in various practical exercises tailored to improve their mental acuity and awareness on the road.

    Obstacle Courses are an excellent way to develop concentration. By navigating through a series of cones or barriers, riders are challenged to maintain precision and control. This exercise requires constant attention to both the immediate surroundings and the bike’s response to maneuvers. Focusing on sharp turns and tight spaces enhances situational awareness, making riders more attuned to potential hazards.

    Slow-Speed Maneuvering is another effective method. When practicing low-speed turns and balance exercises, riders must concentrate on body position and throttle control. This slow-paced practice encourages mindfulness, enabling riders to become attuned to subtle shifts in balance and bike dynamics. Over time, this skill translates into heightened focus during regular riding conditions.

    Speed Management Drills also play a vital role in concentration development. By practicing riding at varying speeds, cyclists learn to adjust their mental focus accordingly. Fast-paced riding requires quick decision-making, while slower speeds demand a different type of concentration, often focused on environmental awareness. Balancing these speeds trains the mind to switch focus effectively, a crucial skill for any rider.

    Group Riding Exercises can further enhance concentration. Riding with others necessitates heightened awareness of fellow riders’ actions, fostering a communal focus. This environment encourages riders to stay alert, anticipate movements, and adjust their own riding strategies, ultimately improving their overall situational awareness.

    Incorporating these practical exercises into regular riding practice contributes significantly to the development of concentration skills. As riders enhance their ability to focus, they not only improve their performance but also increase their safety on the road. Consistent application of these techniques ensures that concentration becomes a natural part of the riding experience.

    Understanding the Role of Mindfulness in Safe Riding Practices

    Mindfulness is the practice of being fully present and engaged in the moment, which is crucial for motorcycle riders. When riding, maintaining awareness of surroundings, traffic conditions, and potential hazards can significantly enhance safety. By embracing mindfulness, riders can reduce the likelihood of accidents caused by distractions or impulsive decisions.

    One of the core aspects of mindfulness is heightened awareness. This allows riders to identify changes in the environment quickly, such as shifting road conditions or the actions of other motorists. Staying present helps in anticipating potential dangers, giving riders more time to react appropriately. For example, recognizing a vehicle merging unexpectedly or a pothole in the road can prevent serious accidents.

    Additionally, mindfulness promotes emotional regulation. Riders often face stressful situations that can affect their judgment. By practicing mindfulness, individuals can manage anxiety and remain calm under pressure. This emotional stability is essential in high-stakes riding scenarios where quick thinking is required.

    Moreover, mindfulness encourages deliberate decision-making. Instead of reacting instinctively, a mindful rider can pause, assess the situation, and choose the best course of action. This mindfulness-based approach leads to more thoughtful maneuvers and a greater understanding of riding dynamics.

    Incorporating mindfulness into riding practices can be achieved through various techniques. Simple breathing exercises can help riders center themselves before hitting the road. Regularly checking in with their body and surroundings during rides can maintain focus and reduce the tendency to zone out.

    Finally, embracing mindfulness not only enhances personal safety but also fosters a culture of respect on the road. When riders exhibit mindfulness, they are more likely to be considerate of others, promoting safer environments for everyone. Overall, understanding and practicing mindfulness is vital for safe motorcycle riding, transforming challenges into opportunities for growth and awareness.

    Strategies for Minimizing Distractions During Motorcycle Lessons

    Strategies for Minimizing Distractions During Motorcycle Lessons

    During motorcycle lessons, maintaining focus is crucial for safety and skill development. To minimize distractions, consider the following strategies:

    First, choose a quiet location for lessons. Parks or designated training areas with minimal traffic and noise are ideal. This reduces external environmental distractions and allows the learner to concentrate fully on the instructor’s guidance.

    Next, ensure that all necessary gear is properly fitted and comfortable. Discomfort due to ill-fitting helmets, jackets, or gloves can divert attention away from the lesson. Prioritize investing in quality gear to enhance focus and comfort.

    Establish a pre-ride routine that includes mental preparation. Spend a few moments visualizing the lesson, reviewing key concepts, and setting specific goals. This mental warm-up can help eliminate distractions by ensuring the rider is mentally present before starting.

    Limit the number of students in a lesson. Smaller groups allow for more personalized attention from the instructor, enabling better communication and reducing the likelihood of distractions from peers.

    Encourage learners to silence their mobile phones and other electronic devices before the lesson begins. Notifications and alerts can significantly disrupt concentration, so creating a distraction-free environment is essential.

    Incorporate short, focused practice sessions. Instead of lengthy lessons, break down the riding techniques into manageable chunks. This approach not only minimizes cognitive overload but also allows for increased retention of information.

    Utilize clear, concise communication from the instructor. Avoid using jargon or overly complex explanations that may confuse the learner. Simple, straightforward instructions can help maintain attention and comprehension.

    Finally, provide breaks when necessary. Allowing time to rest can rejuvenate focus and ensure that riders can absorb information and practice effectively without feeling overwhelmed.

  • When to Replace Spark Plugs and Air Filters

    When to Replace Spark Plugs and Air Filters

    When to Replace Spark Plugs and Air Filters

    Maintaining your vehicle is essential for ensuring its longevity and performance. Among the crucial components that require regular attention are the spark plugs and air filters. These elements play a significant role in the overall efficiency and functionality of your engine.

    Spark plugs ignite the air-fuel mixture in your engine’s combustion chamber, while air filters ensure that clean air enters the engine for optimal combustion. Over time, both components can wear out or become clogged, leading to various performance issues. Recognizing the signs that it’s time to change these parts can save you from costly repairs and improve your vehicle’s efficiency.

    In this article, we will explore common indicators that suggest your spark plugs and air filters may need replacement. Understanding these signs will help you keep your vehicle running smoothly and safely, enhancing your overall driving experience.

    Recognizing Poor Engine Performance Due to Worn Spark Plugs

    Worn spark plugs can significantly impact engine performance, leading to a variety of noticeable issues. Understanding these signs will help you identify when it’s time for replacement.

    • Engine Misfires: One of the most common symptoms of worn spark plugs is engine misfiring. This can manifest as a rough idle, stalling, or hesitation during acceleration.
    • Difficulty Starting: If your engine struggles to start or requires multiple attempts, it could be due to ineffective spark plugs failing to ignite the fuel-air mixture.
    • Reduced Fuel Efficiency: Worn spark plugs can lead to incomplete combustion, causing your engine to consume more fuel than necessary, resulting in visibly reduced miles per gallon (MPG).
    • Rough Idling: If your vehicle shakes or vibrates while at a standstill, this could indicate that spark plugs are not functioning properly, contributing to an unstable engine operation.
    • Unusual Engine Noises: Knocking or pinging sounds may arise from pre-ignition or detonation, often a consequence of faulty spark plugs that affect combustion timing.
    • Illuminated Check Engine Light: A malfunctioning spark plug can trigger the check engine light on your dashboard. This warning should not be ignored, as it may require immediate attention.

    Regular maintenance and timely inspection of spark plugs are crucial for ensuring optimal engine performance. If you notice any of these symptoms, consider having your spark plugs checked or replaced to prevent further damage to your engine.

    Identifying Unusual Engine Noises Linked to Spark Plug Issues

    Identifying Unusual Engine Noises Linked to Spark Plug Issues

    Unusual engine noises can be a clear indication that your spark plugs may need attention. Listening to your vehicle’s sounds while it is running can provide valuable insights into its health. Common signs of potential spark plug issues include a sputtering or hesitating engine, particularly during acceleration, which might signal that the spark plugs are failing to ignite the air-fuel mixture properly.

    Another notable sound is a metallic knocking or pinging noise. This noise often results from pre-ignition, where the air-fuel mixture ignites too early due to excessive heat or incorrect spark plug specifications. If you hear this type of noise, it’s essential to investigate further, as prolonged exposure can lead to significant engine damage.

    Additionally, if your engine emits a popping or backfiring noise, especially during deceleration or while idle, it could indicate that the spark plugs are not firing consistently. This inconsistency can lead to incomplete combustion, causing unburned fuel to escape the combustion chamber and create explosive sounds.

    Other indicators include an increased engine misfire, often experienced as a rough or shaky idling. When spark plugs wear out, the ignition timing can be compromised, leading to these erratic noises and poorer overall engine performance. It is crucial to address any unusual sounds promptly to maintain engine efficiency and prevent further complications.

    Noticing Decreased Fuel Efficiency Related to Clogged Air Filters

    Noticing Decreased Fuel Efficiency Related to Clogged Air Filters

    A clogged air filter can significantly impact your vehicle’s fuel efficiency. Air filters play a crucial role in filtering out dirt, debris, and contaminants from the air entering the engine. When these filters become dirty or blocked, the airflow to the engine is restricted, leading to suboptimal combustion.

    As a result, the engine has to work harder to draw in air, which can lead to a decrease in overall performance and increased fuel consumption. Drivers may notice that their vehicle requires more frequent trips to the gas station or that they are not getting the expected mileage from a full tank.

    In addition to reduced fuel efficiency, other symptoms of a clogged air filter may include rough idling, decreased acceleration, and unusual engine noises. If you experience these signs alongside diminished fuel economy, it may be time to check and replace your air filter.

    Regular maintenance of air filters can improve vehicle performance and help optimize fuel efficiency, ensuring that the engine runs smoothly and efficiently. If a noticeable change in fuel usage occurs, inspecting the air filter should be a priority to prevent further complications. Maintaining clean air filters can ultimately save you money and enhance the longevity of your vehicle.

  • How to Upgrade Your Air Intake for Performance

    How to Upgrade Your Air Intake for Performance

    How to Upgrade Your Air Intake for Performance

    Upgrading your vehicle’s air intake system is one of the most effective and accessible ways to enhance its performance. While many car enthusiasts focus on engine tuning and exhaust modifications, the air intake system plays a crucial role in determining how efficiently your engine breathes. A high-performance air intake system allows for increased airflow, which can lead to significant improvements in horsepower and torque.

    When you upgrade to a specialized air intake, you’re not just changing a component; you’re optimizing the entire air-fuel mixture entering the combustion chamber. More air means that your engine can burn fuel more efficiently, resulting in better acceleration and responsiveness. Additionally, a well-designed air intake can improve the engine’s sound, giving your vehicle a more aggressive growl that many drivers crave.

    Moreover, enhancing your vehicle’s air intake can contribute to better fuel efficiency. By ensuring that your engine receives the ideal amount of air, the vehicle can operate within its optimal range. This balance can lead to increased miles per gallon, providing both performance benefits and economic advantages.

    In this article, we will explore different types of air intake upgrades, their benefits, and what to consider when choosing the right system for your vehicle. Whether you’re a seasoned car buff or a newcomer to automotive modifications, understanding the impact of air intake upgrades can set you on the path to a more exhilarating driving experience.

    Choosing the Right Air Intake System for Your Vehicle Make and Model

    Selecting the appropriate air intake system for your vehicle requires a keen understanding of both your specific make and model as well as your performance goals. Different vehicles have distinct engine setups, which influence the type of air intake that will optimize performance. Assessing factors such as engine displacement, turbocharging, and fuel type is crucial.

    Start by researching your vehicle’s compatibility with various air intake systems. Options generally include cold air intakes, short ram intakes, and intake manifolds. Cold air intakes are designed to pull cooler air from outside the engine bay, enhancing air density and combustion efficiency. In contrast, short ram intakes often provide quicker throttle response but may draw warmer air, which could affect overall performance.

    Consider the material of the intake system. Most options are made from plastic or metal, with metal intakes often providing better durability and heat resistance. However, each material has its pros and cons in terms of weight and heat retention. Be sure to check for air filters as well; reusable filters may save money long-term and improve airflow compared to disposable ones.

    Compatibility with additional modifications is another vital aspect to consider. If your vehicle has aftermarket components like exhaust systems or tuned engines, ensure the air intake system is designed to work harmoniously with these upgrades. Moreover, reading user reviews and seeking advice from auto enthusiasts can provide insights into how different systems perform under real-world conditions.

    Finally, remember that installation ease varies among different air intake systems. Some may require professional installation due to complexity or specific modifications, while others can be a straightforward DIY project. Be sure to weigh the cost of potential installations when budgeting for your performance upgrades. Selecting the right air intake system tailored to your vehicle’s specifications and your performance aspirations will significantly enhance your driving experience.

    Installation Tips for Maximum Gains from Air Intake Modifications

    Installation Tips for Maximum Gains from Air Intake Modifications

    Proper installation of an air intake system is crucial for achieving optimal performance gains. Follow these detailed tips to ensure a successful upgrade.

    First, always read the manufacturer’s instructions thoroughly before starting the installation. Each air intake system may have unique requirements and specifications that are vital for proper functioning.

    Prepare your workspace by organizing tools and components required for the installation. Common tools include screwdrivers, socket wrenches, and pliers. Ensuring everything is accessible will streamline the installation process.

    Before removing the stock air intake, disconnect the battery to prevent any electrical issues. Additionally, make sure to clean the surrounding area to avoid debris entering the engine during the installation.

    When replacing the stock intake, pay close attention to the orientation of the new components. Ensure that the air filter is properly positioned to prevent any airflow restrictions. Positioning is key to maximizing the amount of cool, dense air entering the engine.

    Use high-quality clamps and fittings to secure the new intake system. Loosely tightened connectors can lead to air leaks, which diminish the performance benefits of the upgrade. Double-check all connections to ensure they are properly tightened.

    Consider reinforcing any brackets or mounts provided with the new intake system. Vibration and engine movement can cause stress on components, leading to premature wear or damage if not securely mounted.

    After installation, perform a visual and functional check of the entire setup. Ensure there are no obstructions blocking the airflow path and that all hoses and connections are intact.

    Once everything is securely in place, reconnect the battery and start the engine. Allow it to idle and check for any unusual sounds or warning lights on the dashboard. If everything appears normal, take the vehicle for a short test drive to feel the improvements in throttle response and engine performance.

    Finally, always follow up on any scheduled maintenance related to your air intake system. Cleaning or replacing the air filter regularly will maintain optimal airflow and performance over time. With these installation tips, you can ensure your air intake modifications deliver the maximum possible gains for your vehicle.

    Monitoring Your Vehicle’s Performance After Upgrading the Air Intake

    Monitoring Your Vehicle's Performance After Upgrading the Air Intake

    When you’ve upgraded your vehicle’s air intake system, it’s crucial to monitor its performance to ensure that you are reaping the full benefits of the modification. This process involves a combination of observing real-world driving experiences and using diagnostic tools.

    1. Observe Real-World Performance: Begin by paying attention to how your vehicle feels during acceleration and overall driving. A noticeable improvement in throttle response is often a direct indicator of a successful upgrade. Look for increased power during high RPMs and smoother performance during low-speed driving.

    2. Use an OBD-II Scanner: Consider employing an OBD-II scanner to monitor various engine parameters. This tool can provide real-time data on air-fuel ratio, engine load, and even engine temperature. A well-functioning air intake should help achieve a more optimal air-fuel mixture, resulting in better performance and fuel efficiency.

    3. Track Fuel Efficiency: Document your vehicle’s MPG both before and after the installation. A successful air intake upgrade typically leads to improved fuel efficiency due to better airflow and increased engine performance. Ensure you are measuring in similar driving conditions for accurate comparisons.

    4. Dyno Testing: For the most accurate performance evaluation, consider using a dynamometer (dyno). This will give you precise measurements of horsepower and torque before and after the upgrade. A dyno test can highlight differences you might not feel during everyday driving.

    5. Listen for Unusual Sounds: Pay attention to any new sounds from the engine. While a louder intake noise can be normal, any irregular noises may indicate installation issues or potential problems with the new components. Promptly addressing any concerns can prevent long-term damage.

    6. Check Engine Codes: After installing the new air intake, regularly check for any engine codes that may appear. Upgraded air intake systems can sometimes trigger the check engine light if not calibrated properly. Ensure your vehicle’s ECU is tuned to accommodate the new modifications.

    By implementing these monitoring techniques, you can effectively gauge the performance of your vehicle after upgrading the air intake. This proactive approach ensures that your modifications are functioning as intended, enhancing your driving experience.

  • Waterproof vs Vented Riding Gear – What to Know

    Waterproof vs Vented Riding Gear – What to Know

    Waterproof vs Vented Riding Gear – What to Know

    When it comes to choosing the right riding gear, understanding the distinct characteristics of waterproof and vented options is crucial for maintaining comfort and safety on the road. Both types of gear serve specific purposes and cater to different riding conditions, making informed decisions essential for riders of all levels.

    Waterproof riding gear is designed to keep riders dry in wet conditions, utilizing specialized materials and construction techniques to prevent rain and moisture from penetrating the fabric. This type of gear often features sealed seams and waterproof zippers, ensuring that riders remain comfortable even during heavy downpours. However, while waterproof gear excels in keeping the elements at bay, it may lack breathability, which can lead to overheating during prolonged wear.

    On the other hand, vented riding gear prioritizes airflow and moisture management, making it an optimal choice for warm weather conditions. This type of gear typically incorporates mesh panels and ventilation systems that promote circulation, allowing body heat and sweat to escape. While vented gear provides excellent cooling properties, it may not offer the same level of protection against rain, necessitating additional layers or waterproof covers in inclement weather.

    In summary, the key differences between waterproof and vented riding gear stem from their intended use and environmental suitability. Riders must assess their riding habits, climate conditions, and personal comfort preferences to select the most appropriate gear for their needs.

    How Waterproof Gear Protects Against Rain and Moisture

    Waterproof gear is specifically designed to prevent water from penetrating its fabric, thus keeping the rider dry during rainy conditions. This type of gear typically employs advanced materials and technology, such as membrane systems like Gore-Tex or similar, which offer a barrier against water while allowing moisture generated from the body to escape.

    The primary feature of waterproof riding gear is its ability to repel water. The outer layer is treated with a durable water repellent (DWR) finish that causes water to bead up and roll off the surface, rather than soaking into the material. This ensures that the gear remains lightweight and breathable, preventing the accumulation of water weight.

    Another crucial aspect of waterproof gear is its construction. Sealed seams and additional waterproof zippers enhance the overall integrity of the garment, ensuring that moisture cannot enter through common entry points. This meticulous construction is vital for maintaining dryness in heavy rain conditions.

    Moreover, waterproof gear often incorporates an inner lining that not only enhances comfort but also provides an extra layer of protection against moisture. This lining can be made of moisture-wicking fabrics that draw sweat away from the skin, preventing the rider from feeling damp from their own perspiration.

    In addition to preventing water ingress, waterproof gear is often wind-resistant, providing further protection from the elements. This combined protection enables riders to stay comfortable and focused, regardless of changing weather conditions.

    Overall, waterproof gear is an essential investment for any rider who frequently encounters rain and wet environments, ensuring optimal performance and comfort during every ride.

    Understanding Breathability in Vented Riding Gear

    Understanding Breathability in Vented Riding Gear

    Breathability is a crucial feature of vented riding gear, designed to enhance comfort during various weather conditions. It refers to the fabric’s ability to allow moisture vapor produced by the body to escape while preventing water from entering. This balance is vital for maintaining an optimal microclimate between the rider and the gear.

    Vented riding gear typically employs specialized fabrics that have micro porous structures. These structures enable air circulation and moisture transfer, which helps regulate body temperature. When a rider exerts themselves, sweat is generated, and breathable materials facilitate its evaporation. The result is a significant reduction in discomfort associated with excess humidity, allowing for a more enjoyable riding experience.

    The degree of breathability in riding gear is often measured in grams per square meter (g/m²) of moisture vapor that can pass through the fabric within a specific time frame. Higher ratings indicate better performance. However, breathability can also be affected by other factors such as the garment’s fit and the layering system used. A snug fit can limit airflow, while a looser construction may provide enhanced ventilation but compromise protection.

    Incorporating vents strategically within the garment is another method to improve breathability. Common locations for these vents include the sides, back, and underarms, where airflow is naturally increased. Many modern vented pieces come with adjustable openings, allowing riders to customize airflow based on weather conditions and personal preference.

    For riders engaging in long rides or across varying terrains, choosing vented gear with excellent breathability is paramount. This not only elevates comfort but also can significantly reduce fatigue and improve overall performance. Understanding these features can help in selecting the right gear for a more enjoyable riding experience.

    Choosing the Right Gear for Different Weather Conditions

    Choosing the Right Gear for Different Weather Conditions

    When riding, selecting the appropriate gear for varying weather conditions is crucial for ensuring comfort and safety. In wet conditions, waterproof gear is essential to keep you dry and prevent hypothermia. Look for materials like Gore-Tex or similar membranes that offer excellent water resistance while allowing breathability. This way, sweat is not trapped against your skin, reducing discomfort during prolonged rides in rain.

    In contrast, vented gear is best suited for hot weather. This type of apparel typically includes mesh panels and larger vents that promote airflow, helping to regulate body temperature. Look for jackets and pants designed specifically for summer riding, as they provide a balance between protection and ventilation. Remember to consider protective features like armor, which should not be compromised for the sake of ventilation.

    In cooler temperatures, layering becomes essential. A waterproof outer layer paired with thermal or insulated inner layers can maintain warmth while keeping you protected from wind and moisture. Ensure your gear offers a snug fit to prevent drafts, and consider adding windproof accessories like neck gaiters and gloves to complete your setup.

    Lastly, always check the weather forecast before heading out. Having the right gear at the ready can make the difference between an enjoyable ride and a miserable one. Be proactive in your choices, switching between waterproof and vented gear based on the expected conditions, and adjust your inner layers accordingly. Comfort is key, but protection should always remain a priority.

  • Setting Up Your Bike for Off-Road Performance

    Setting Up Your Bike for Off-Road Performance

    Setting Up Your Bike for Off-Road Performance

    When it comes to conquering rugged trails and challenging terrains, the performance of your bicycle can make all the difference. Off-road biking demands a unique set of skills and equipment, and ensuring that your bike is optimized for such adventures is crucial. From the right tires to adjustable suspension and frame geometry, every aspect of your bike contributes to its overall performance in demanding conditions.

    Understanding the Terrain is the first step in optimizing your bike. Different terrains, such as rocky paths, muddy trails, or sandy dunes, require specific setups to enhance traction and stability. Each type of surface can present its own challenges, which means that a one-size-fits-all approach is rarely sufficient. Knowing what to expect on your ride empowers you to make the most effective modifications.

    Furthermore, investing in quality components is essential for off-road biking. Whether it’s upgrading your tires for better grip or fine-tuning your suspension to absorb shocks, high-quality parts can significantly elevate your riding experience. Each enhancement you make not only improves performance but also increases your comfort and safety on the trail.

    Ultimately, the key to a successful off-road biking experience lies in customization. Your bike should reflect your personal riding style and the specific demands of the trails you frequent. By tailoring your setup, you can enhance control, durability, and speed, ensuring that every ride is both exhilarating and safe.

    Upgrading Tires for Traction and Durability

    Upgrading Tires for Traction and Durability

    One of the most crucial upgrades for optimizing your bike’s off-road performance is selecting the right tires. Tires significantly influence traction, control, and overall durability when riding on rough terrains.

    First, consider the tread pattern. Tires with deeper, more aggressive treads can provide better grip on loose surfaces like mud, sand, and gravel. Look for tires that feature widely spaced knobs designed to shed mud efficiently, ensuring that the contact patch remains clear for optimal traction.

    Next, assess the tire width. Wider tires typically offer increased surface area, enhancing stability and traction. They can also run at lower pressures, which allows for better shock absorption and improves control over uneven terrain. However, wider tires can increase rolling resistance; thus, finding the right balance is essential.

    Durability is equally important, especially for off-road conditions. Opt for tires made from high-quality rubber compounds that resist punctures and abrasions. Some tires incorporate protective layers or reinforced sidewalls to prevent damage from sharp rocks and roots. Consider models specifically designed for your typical riding environment to enhance longevity.

    Another factor to evaluate is the tire’s compatibility with your bike and riding style. Ensure that the upgraded tires fit your rims correctly and match your bike’s specifications. Factors such as the terrain type, riding frequency, and personal preference should guide your choice.

    Finally, don’t underestimate the importance of tire pressure. Adjusting the pressure according to terrain can significantly impact performance. Lower pressures maximize grip on rough surfaces, while higher pressures are suitable for hard-packed trails. Regularly check and maintain the optimal tire pressure for your conditions.

    In conclusion, upgrading your bike’s tires with a focus on tread pattern, width, durability, compatibility, and pressure management will greatly enhance off-road performance, providing the traction and reliability needed for adventurous rides.

    Tuning Suspension for Enhanced Control

    Tuning Suspension for Enhanced Control

    Suspension tuning is critical for maximizing your bike’s performance in off-road conditions. Proper adjustments can drastically improve handling, comfort, and stability over rough terrain. Here are key aspects to consider when tuning your suspension.

    Understand Your Terrain: Different types of off-road surfaces–such as rocky trails, muddy paths, or sandy dunes–require specific suspension setups. Assess your typical riding environment to determine if you need a softer or firmer setup. Softer suspension is generally better for absorbing bumps, while firmer settings improve control on smoother trails.

    Adjusting Fork Compression: The front fork’s compression setting controls how quickly the forks compress under impact. A slower compression setting is suitable for technical trails where sharp impacts are common, as it allows more time for the suspension to absorb shocks. Conversely, a quicker compression setting may be beneficial for smoother rides, as it offers better responsiveness during jumps or rapid maneuvers.

    Rebound Settings: Rebound damping affects how quickly your suspension returns to its original position after compressing. Too fast can lead to a bouncy ride, while too slow may cause the bike to feel sluggish. A well-tuned rebound setting allows the suspension to settle smoothly without losing traction, providing enhanced control on descents and over obstacles.

    Spring Rate Selection: The spring rate is crucial for providing the right amount of support. A heavier rider may require stiffer springs, while lighter riders benefit from softer springs. Choosing the correct spring rate enhances the bike’s ability to absorb terrain variations, improving overall comfort and control.

    Use the Right Tools: Investing in a good set of suspension tuning tools can greatly facilitate adjustments. A shock pump, for example, allows for precise tuning of air pressure, while a suspension setup guide helps you track and modify settings effectively.

    Test and Fine-Tune: After making initial adjustments, take your bike for a test ride. Pay attention to how it responds to various terrains. Make incremental changes to your settings and continuously evaluate the bike’s performance. This iterative approach helps identify the ideal setup for your specific riding style and conditions.

    Tuning suspension properly will elevate your control and confidence while riding off-road. By taking the time to customize your setup, you’ll enjoy improved handling, increased comfort, and an overall better riding experience.

    Adjusting Gearing for Varied Terrain

    When off-road cycling, the ability to tackle different terrains efficiently largely depends on your bike’s gearing. Adjusting the gearing allows you to optimize your pedaling power, improve traction, and enhance overall performance across challenging landscapes.

    A crucial aspect of gearing is the gear ratio, which is determined by the size of your chainrings and cassette. For steep climbs, opting for a lower gear ratio makes it easier to pedal uphill by reducing the effort required per pedal stroke. This allows for better control and stability on rocky or uneven surfaces, where maintaining momentum is vital.

    Conversely, when navigating flat or downhill sections, a higher gear ratio enables you to achieve greater speed. Shifting to larger chainrings and smaller sprockets provides the necessary leverage for efficient high-speed pedaling. However, be aware of the terrain; shifting too late can result in losing power and slowing down.

    Multi-chainring setups generally provide more flexibility for varied terrain, allowing for finer control when shifting between climbs and descents. On the other hand, a single-chainring system simplifies shifts and reduces weight, which could be beneficial in technical off-road conditions, where quick gear changes are crucial.

    Consider the tire size as well, as larger tires may require adjustments in gearing to maintain optimal cadence. A wider tire increases rolling resistance, necessitating either lower gearing to aid climbing or a different strategy to manage speed effectively as you ride.

    Lastly, practice makes perfect. Experiment with different gearing setups during your rides to discover what combinations work best for you in various conditions. Understanding your bike’s capabilities and tailoring your gearing accordingly will significantly enhance your off-road experience.